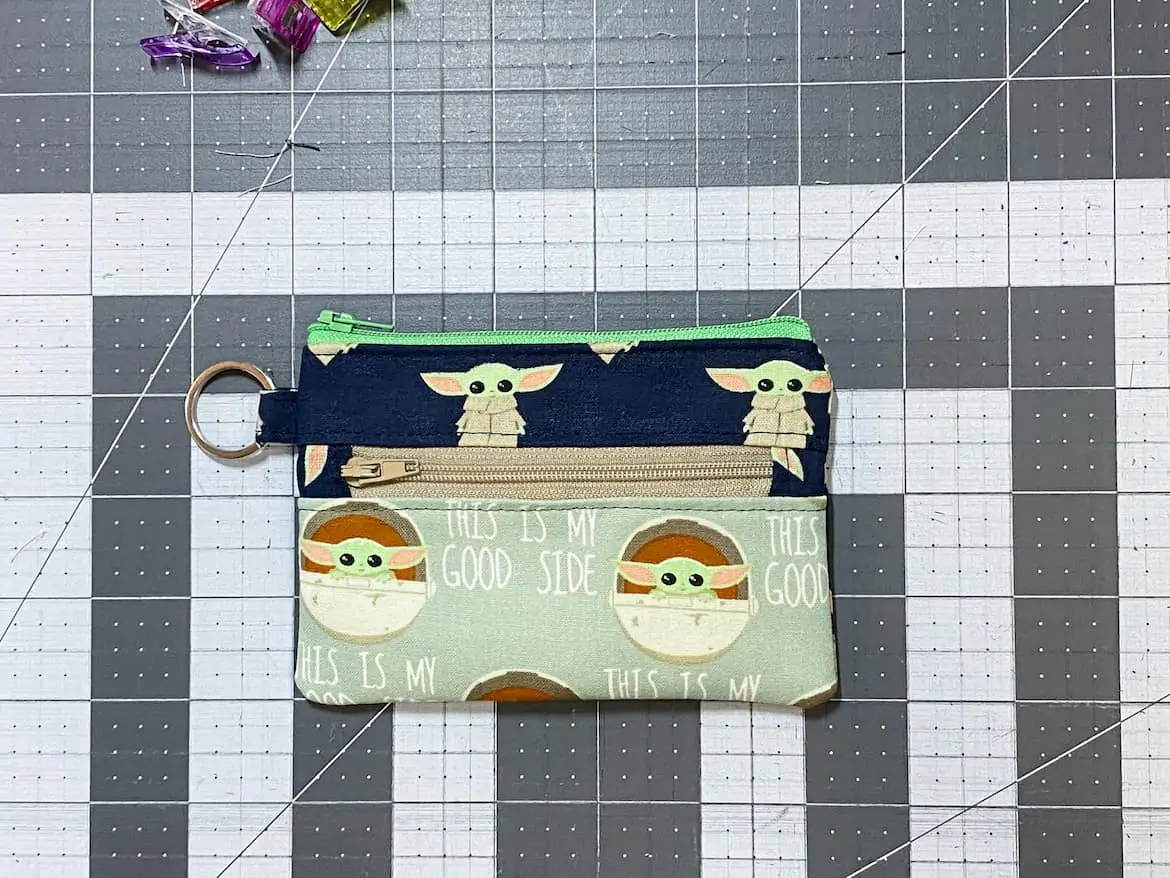
This is a free sewing pattern for beginners that uses very little fabric so it’s a great scrap buster. Make your own super cute fully lined, 2 zipper DIY coin purse with our free coin purse pattern. The handy split keyring lets you show off your love for the Star Wars Mandalorian series (especially Baby Yoda Grogu!) while being functional too.
I recommend using durable 100% cotton fabric throughout, but I’ve also made these using flannel and canvas fabric for the exterior successfully. It’s a versatile design, so feel free to use just about any type of fabric you have on hand!
If you are really comfortable with zippers and want to give your project an upgrade, feel free to try switching out the nylon zippers for metal zippers.
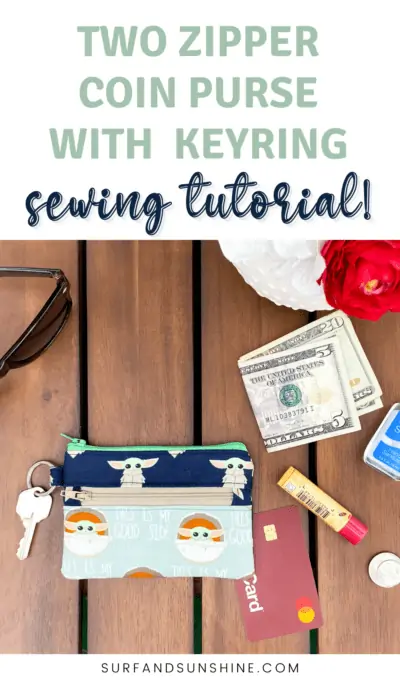
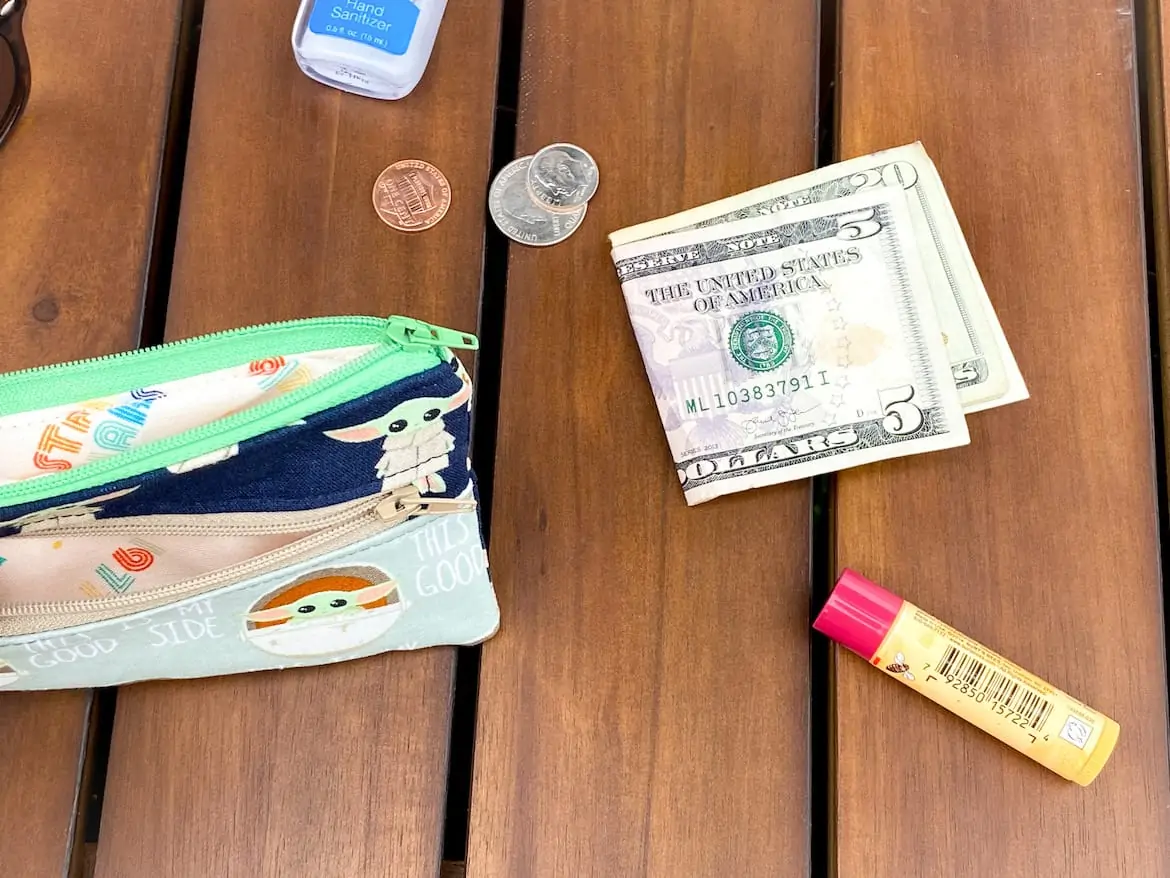
I find this little double zip pouch is the perfect grab and go wallet. I can fit not only cash and credit cards, but my chapstick and hand sanitizer too.
✔ Two zippered compartments
✔ Fully lined
✔ Split ring for keys
You can carry it by itself, or throw it into your larger purse or bag.
This DIY coin purse also goes along perfectly with my matching makeup/travel sized pouch.
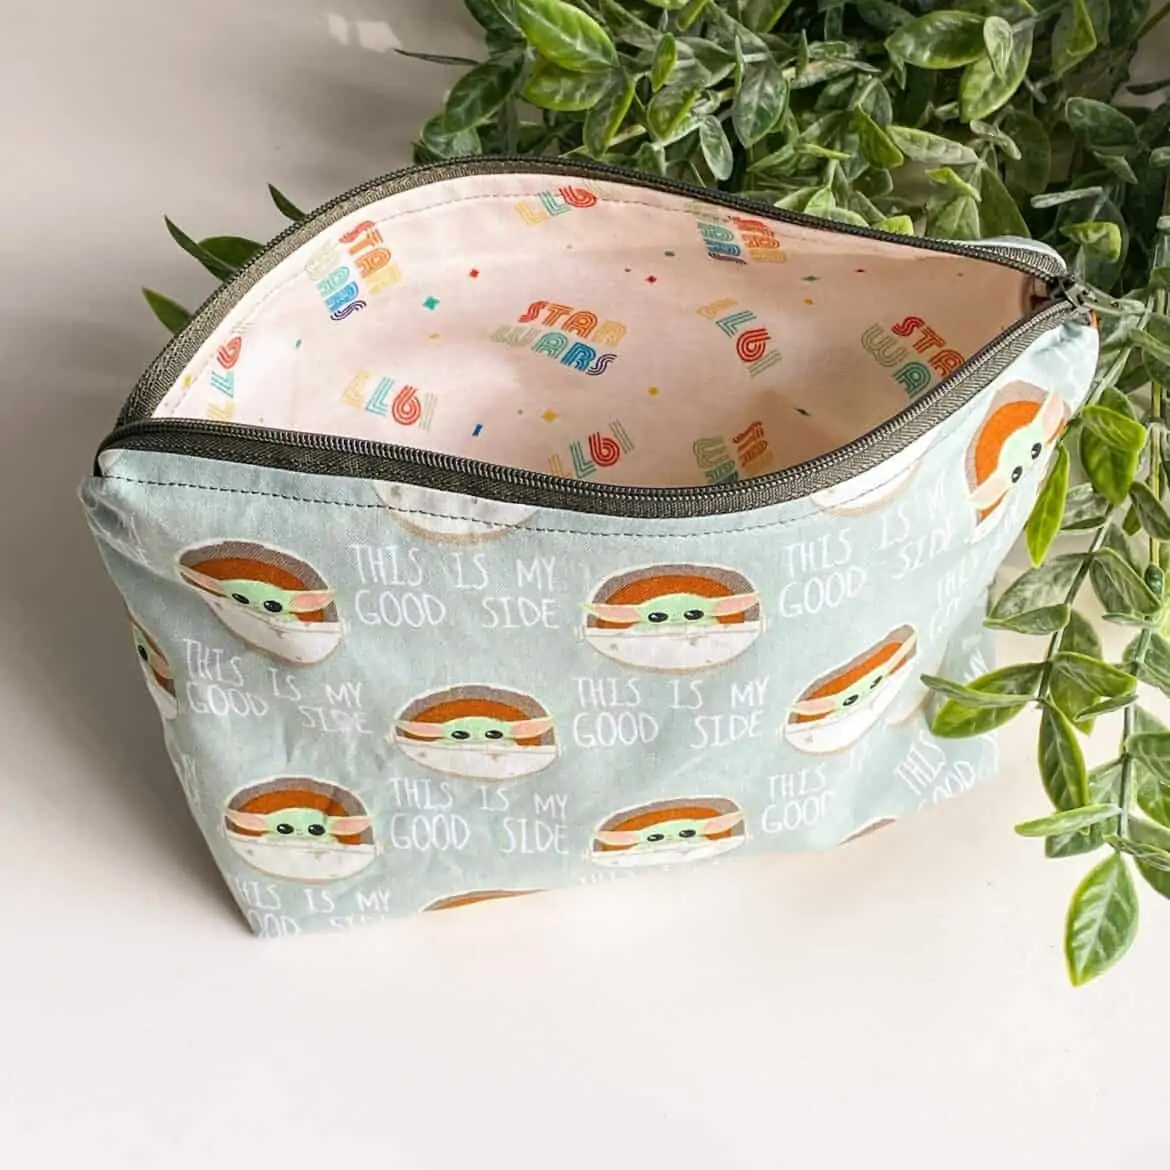
When I’m traveling light, I’ll use the larger pouch to pack my bathroom items in my carry-on or my electronics and cords in my backpack.
Then, I also use the same pouch as a clutch purse or camera case while I’m at my destination.
Free Sewing Pattern Step by Step Tutorial
Finished measurements approximately 3.5” Tall x 5.5” Wide
SEWING SKILL LEVEL: Advanced Beginner
Required sewing knowledge: Be comfortable with sewing nylon zippers and know how to add zipper tabs (don’t worry, I help you with a quick and easy cheat for this below).
Supplies Needed
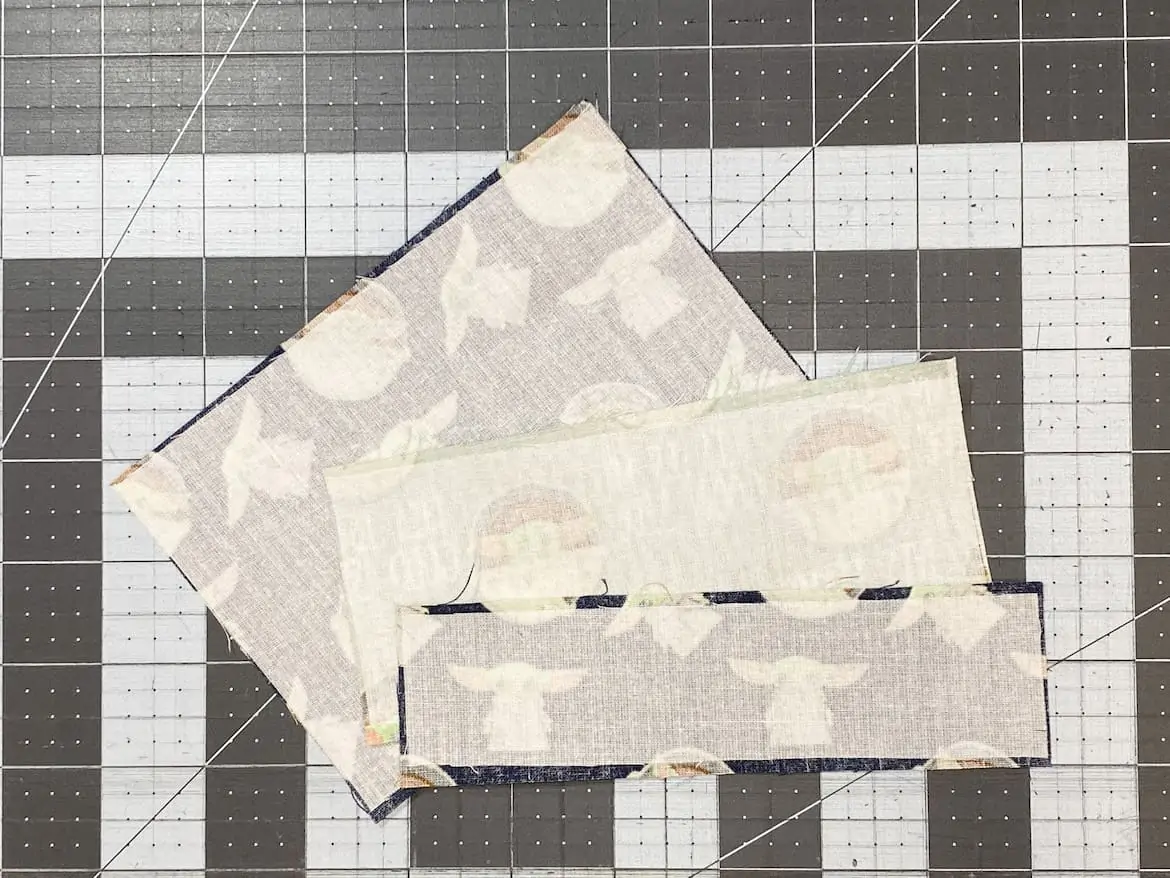
My free DIY coin purse pattern is actually not a “pattern” at all. No need to waste paper or time by tracing out pattern pieces here. Every piece is rectangular and can be cut direct from your fabric.
I also love that you use very little fabric for this project and it’s a great scrap buster. With just 1/4 yard of fabric of each the main, accent and lining – you could make at least 3 coin purses!
After making this, you’ll start saving every single scrap of your favorite fabrics.
Main Fabric (I used this 100% Cotton BLUE BABY YODA fabric)
- (1) 6 ¼” W x 1 ¾” T for front pocket panel top (INTERFACE THIS PIECE)
- (1) 6” W x 4 ¼” T for back panel (INTERFACE THIS PIECE)
- (1) 2” x 2” for ring tab
- (2) 2 ½” x 2” front zip tabs
Accent Fabric (I used this 100% Cotton GREEN BABY YODA fabric)
(1) 6 ¼” W x 2 ¾” T for front pocket panel bottom (INTERFACE THIS PIECE)
Lining Fabric (I used this 100% Cotton STAR WARS 1977 fabric)
- (1) 6 ¼” W x 1 ¾” T for front pocket panel top
- (1) 6 ¼” W x 2 ¾” T for front pocket panel bottom
- (1) 6” W x 4 ¼” T for front pocket back panel
- (2) 6” W x 4” T main pouch lining
Pellon SF101 Interfacing (I used this)
- (1) 6” W x 1 ½” T for front pocket panel top
- (1) 6” W x 2 ½” T for front pocket panel bottom
- (1) 6” W x 4” T for back panel
Hardware
- (1) Olive 7”+ nylon zipper for main top opening (I used this #3 Fresh Green but when I’m not feeling so flashy will use this this #3 Black Olive instead)
- (1) Khaki 5”+ nylon zipper for front pocket (I used this #3 Greyish Olive)
- (1) 1” split ring (I used these)
Sewing Tools and Accessories Used
- Self healing cutting mat with gridlines (I prefer two sided so that I can just flip it instead of having to buy a new one!)
- Olfa deluxe rotary cutter
- Omnigrid non-slip ruler
- Sharp fabric scissors
- Heat erasable fabric marking pens (I use these)
- Sewing clips
- Clover point2-point turning tool
- I prefer Gutermann Sew-All Thread
- I use a Singer OnePlus Sewing Machine (no longer sold in stores)
*Full Sew Along video coming soon!*
Sewing Instructions
No PDF pattern is needed for this fairly easy sew along to make your DIY Coin Purse. Just cut all pieces needed in the measurements listed above. They are all rectangles.
Iron the SF101 Interfacing onto the 3 exterior pieces, as noted.
Take your 2”x2” ring tab piece and place it wrong side up. Fold it in half and press so that you have a crease down the middle.
Now open and fold each side in to the middle crease so it looks like this.
Now fold on the center crease so that the top and bottom edges meet. You will end up with a piece that is ½” wide and 2” long.
Topstitch (I like to use a 3.0 stitch length) along both long edges about ⅛” in from the edge.
NOTE: You can backstitch at the beginning and end of each stitch line if you like, but I do not since the raw edges will be sealed into side seams later.
Set aside. You won’t need this piece until the end.

How to make super quick zipper tabs
This is my quick'n dirty method for making zipper tabs where you don't  care about the back side looking pretty. Please note, this is NOT how I would recommend making zipper tabs for the top/main zipper (if you wanted to make them there).

This method leaves the back side ugly, so I only use it here due to the size of the front pocket and it's orientation.
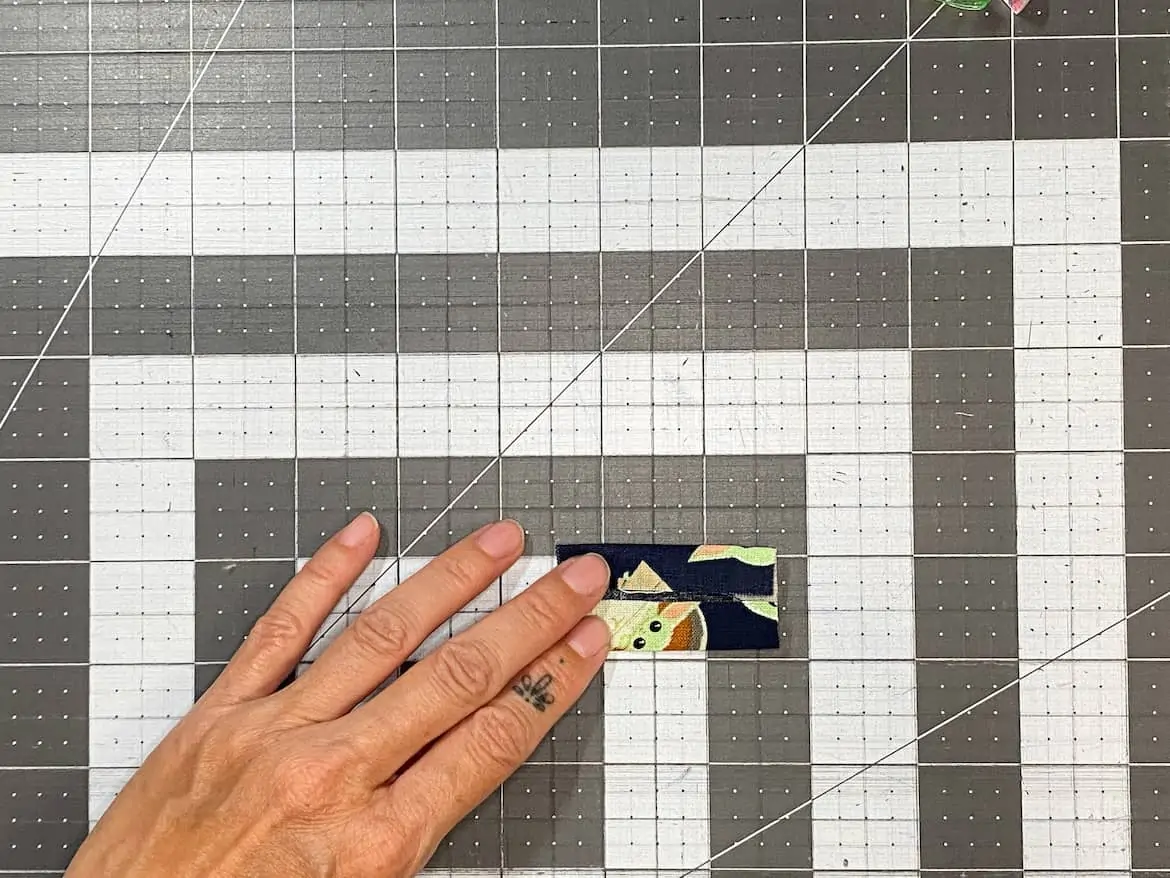
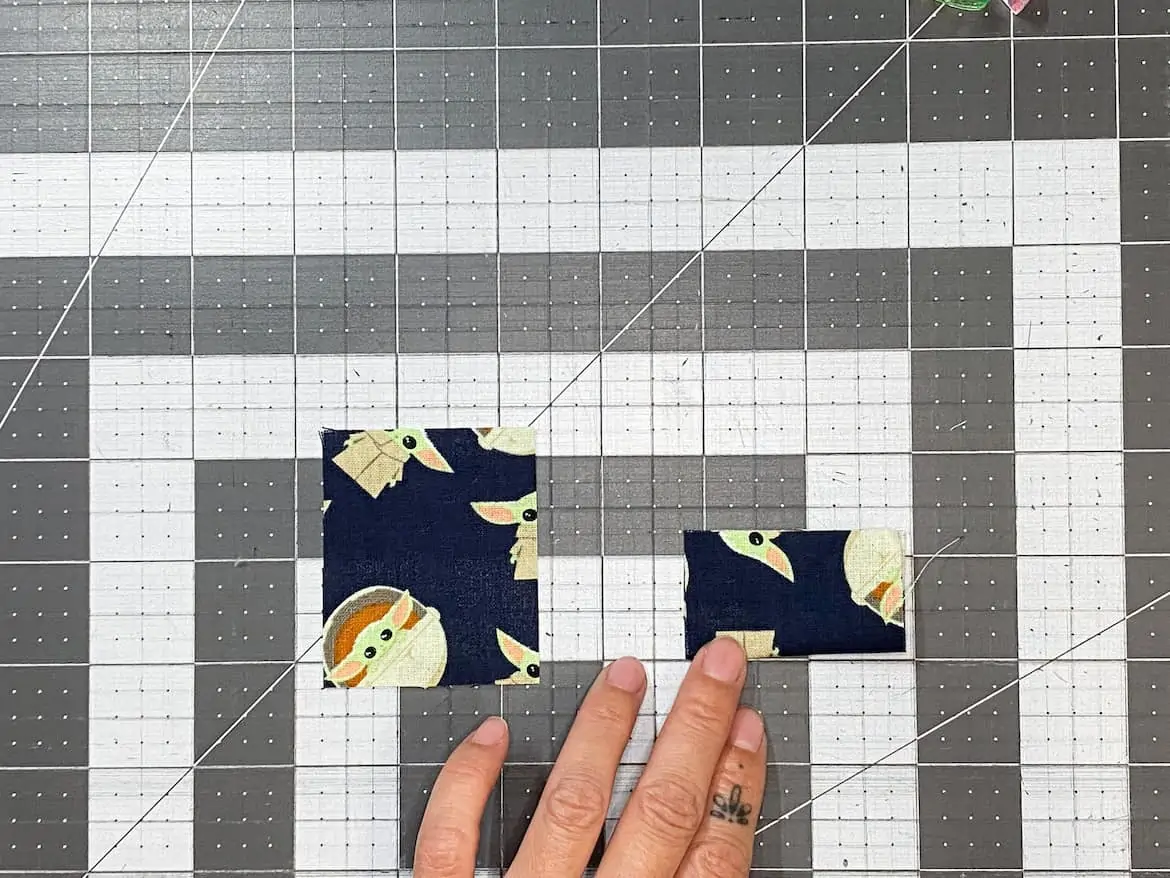
Take the two small 2 ½” x 2” pieces for the front zip tabs and fold them in half, wrong sides together, so that you get a crease down the middle.
Trim both metal stops off the 5” zipper.
As you can see in my photo below, I like to remove and reattach the zipper pull in a way that closes both ends. It is much easier to sew this way! If you'd like to learn how I did this, please watch the full video tutorial here.
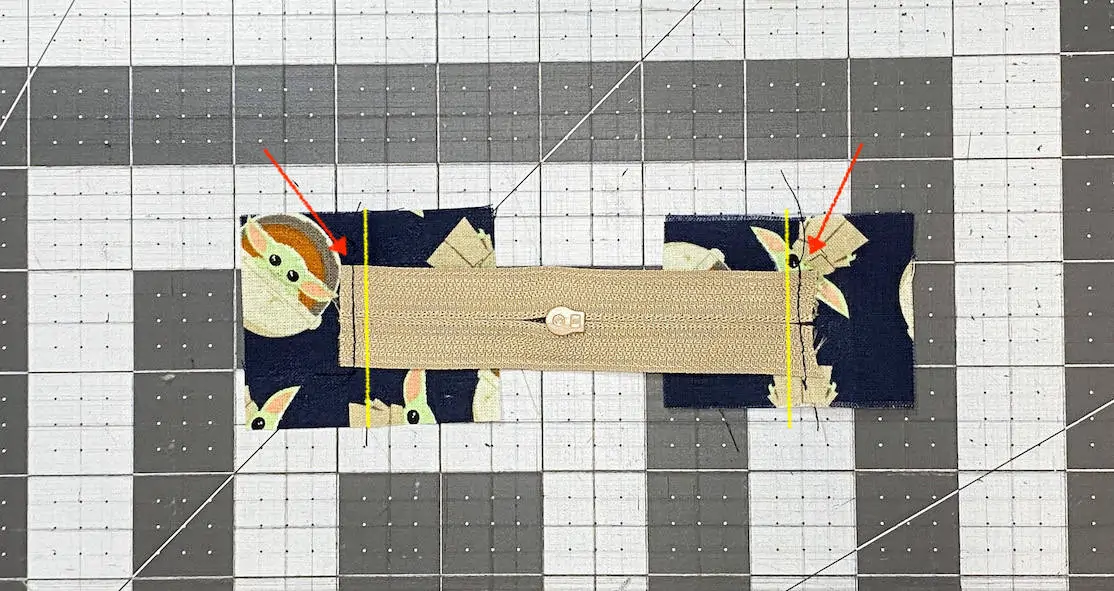
Open your zipper tab pieces, right side face up, and place the trimmed zipper face down on top. You want to sew the ends of the zipper tape just past the center seam (marked in yellow) on each side as below.
Turn this right side up and fold the tabs on that original crease so it looks like below. Take this back to the sewing machine and topstitch about 1/8″ in (you’re basically sewing over the last stitch you just made that is now hidden inside your tab fold)
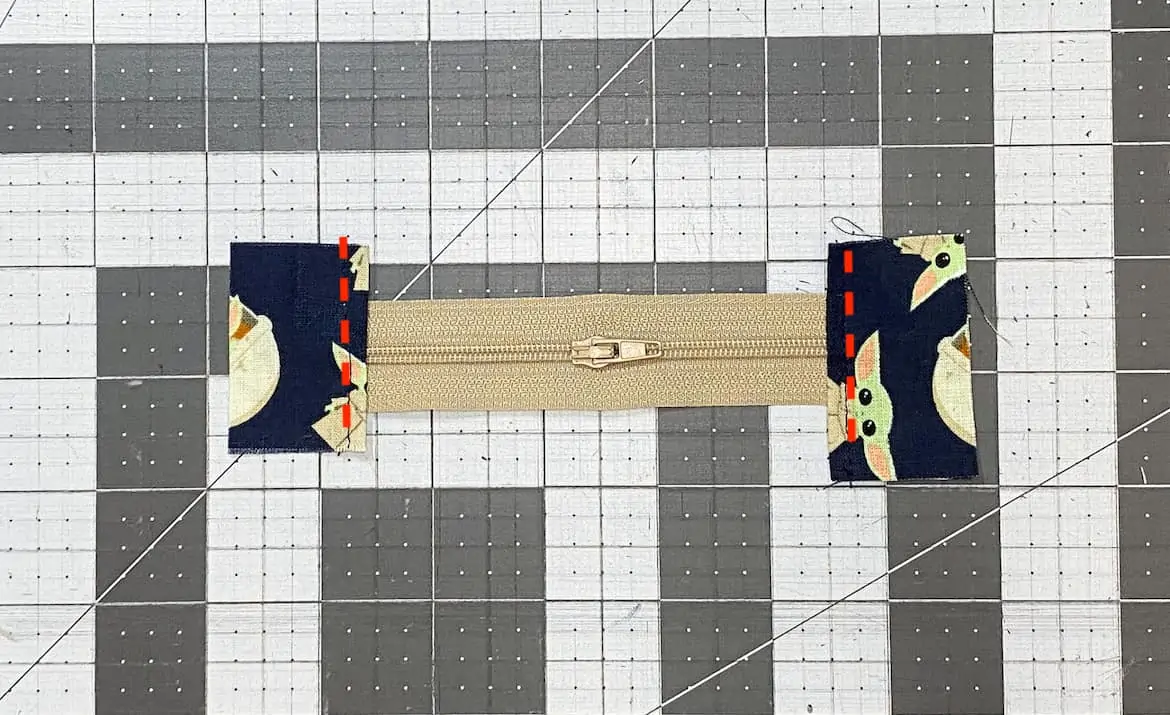
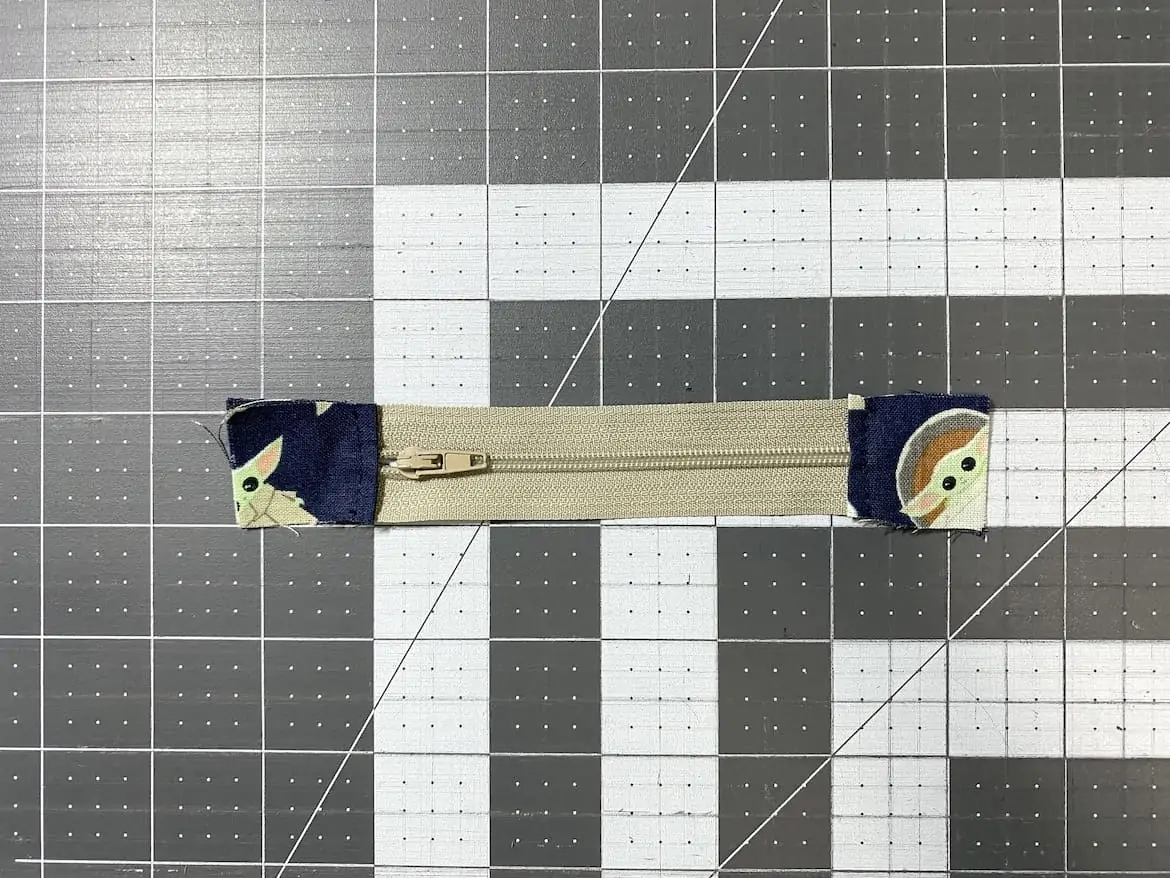
You should end up with a tabbed zipper that is at least 6 ¼” long. Trim excess from top and bottom of tabs so that the entire strip matches the width of the zipper.
Be sure to test your zipper and make sure it functions properly.
Place the front pocket panel bottom piece right side up.
Ok now there are two ways you can proceed here.
For either method, first make sure the zipper pull opens in the direction you like. For instance, I want to open the pouch pulling the zipper from the left to right, so the zipper pull (in it’s closed position) is on the left for me.
When I first started learning how to sew, every tutorial I followed on how to make a lined pouch did it this way, I call it The Sandwich Method:
THE SANDWICH METHOD FOR ZIPPERS

1. Align the 6 ¼” tabbed zipper you just made with the top of the front pocket panel bottom piece with the zipper face down.

2. Place the front pocket panel bottom lining piece on top of the zipper, also right side face down, creating a sandwich with right sides together and you should only see wrong sides on the outside.

3. Use a zipper foot to sew all 3 pieces together along the top using a ¼” seam allowance.

NOTE: You will need to pause (needle down) to move the zipper pull out of the way often during this tutorial. JUST DO IT. Don't be lazy - or you'll end up with really ugly crooked lines, especially on top topstitching!
But, you may find that like me, you get frustrated with some slippage of the fabric using this method. My fabrics were always getting misaligned and I couldn’t keep a very consistent nice seam along the zipper tape either.
Then I discovered the baste method, where you basically just attach one piece of fabric to the zipper at a time. Yes, this way seems a bit slower and repetitive, but I PROMISE you, you will love this method too.
Your zippers will turn out much neater and you won’t end up with crooked or misaligned panels. An added bonus is that your pouch will last much longer and be sturdier due to the reinforced stitching!
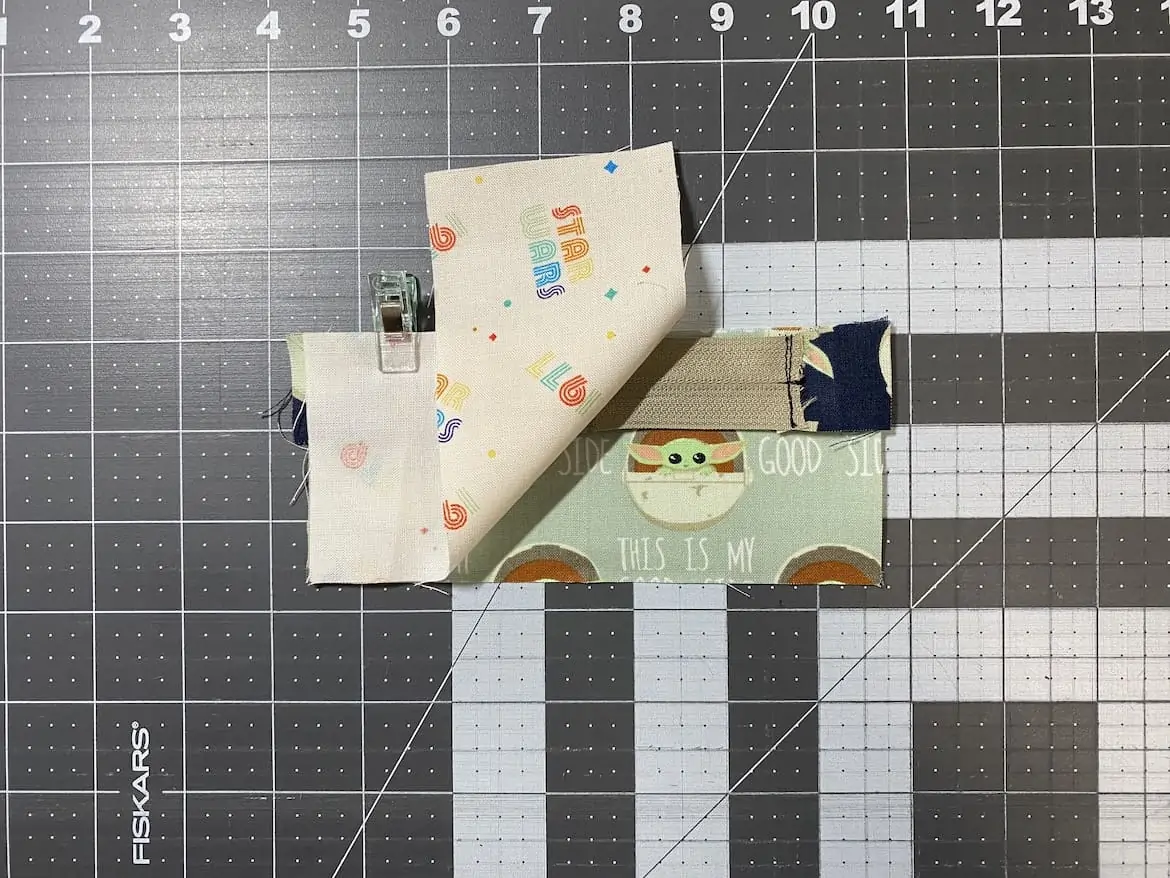
THE BASTE THE ZIPPER FIRST METHOD (I just made this up - I have no idea what it's called)

1. Place the front pocket panel bottom piece right side up. Align the 6 ¼” tabbed zipper you just made with the top of this piece with the zipper face down.

2. Baste these two together using about 1/8" seam allowance. Try to stay near the edge, away from the zipper since you don't want this stitch showing through later. I use the max stitch length on my machine.
3. NOW, place the front pocket panel bottom lining piece on top of the zipper, also right side face down, and use a zipper foot to sew all 3 pieces together along the top using a ¼” seam allowance, and standard stitch length (I use 2.4 throughout).
TIP: I like to align and clip the lining piece on top like the photo above, but when I sew this, I will actually flip this over so I can see that first basting stitch I made.

Sewing it with the loose lining piece on the BOTTOM, actually helps reduce fabric slippage and also lets me see the baste stitch so I can  be sure to sew closer to the zipper than it.
Whichever method you choose, you will still end up with the the zipper sandwiched in between an out piece and a lining piece.
(From this point on, I will match the video tutorial and do my preferred baste the zipper first method – but feel free to just sandwich all three together and do one sew across if you like!)
Press both sides open with right sides facing out and topstitch using ⅛” seam allowance.
Align the bottom of the front pocket panel top piece (right side face down) with the zipper tape edge of the panel you just made (right side facing up).
If you are using directional fabric like I am (where there is a definite right side up to the pattern), you’ll want to make sure the “top” is facing the “bottom”. For instance, notice Baby Yoda’s head is towards the bottom of the pouch.
An easy way to double check you have it facing the correct way is to simply start off with the design as you want the end product to appear, right sides all facing you.
Then, just sort of fold the top piece down onto the bottom piece. (Please see the video for a clearer visual of this)
Clip in place and baste with 1/8″ seam allowance.
Flip this over so that the lining side is now face up. Do the same as above with the front pocket panel top lining piece. Place it face down, aligning with the open edge of the zipper tape.
Clip in place and sew all 3 pieces together using a ¼” seam allowance, remembering to sew with the lining on the bottom so you can see the previous baste stitch you made on top.
Press both top sides open like before with the right sides facing out.
Topstitch using ⅛” seam allowance so you’ll end up with a piece like below.
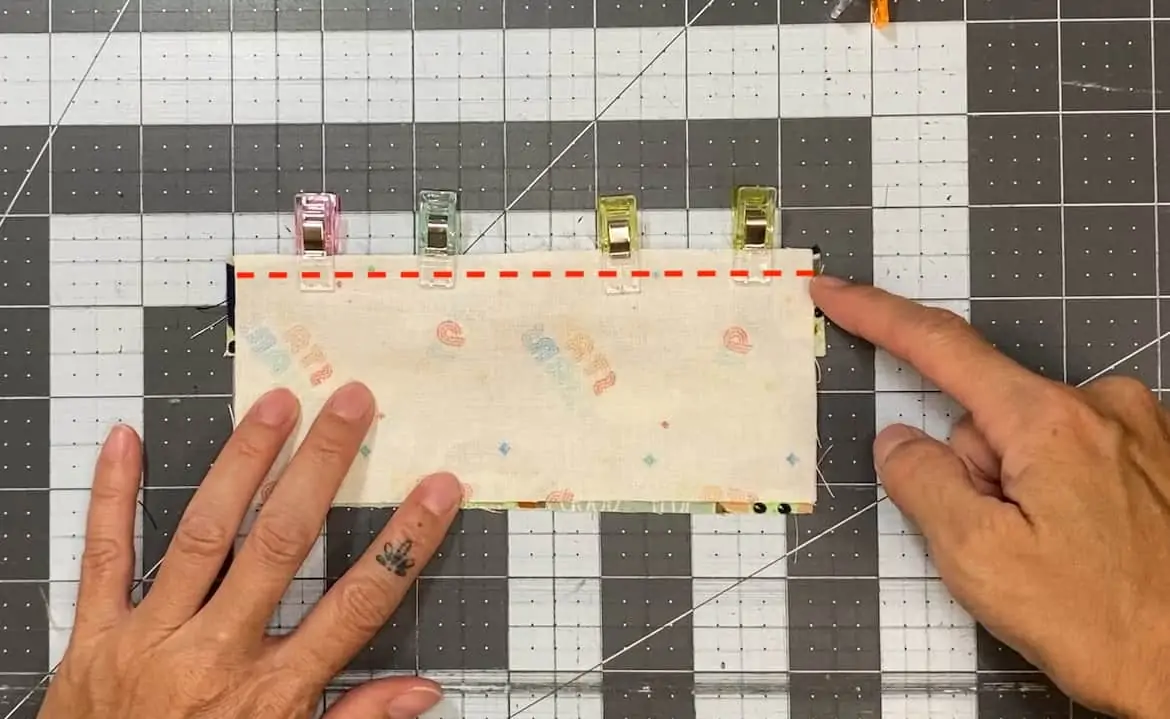
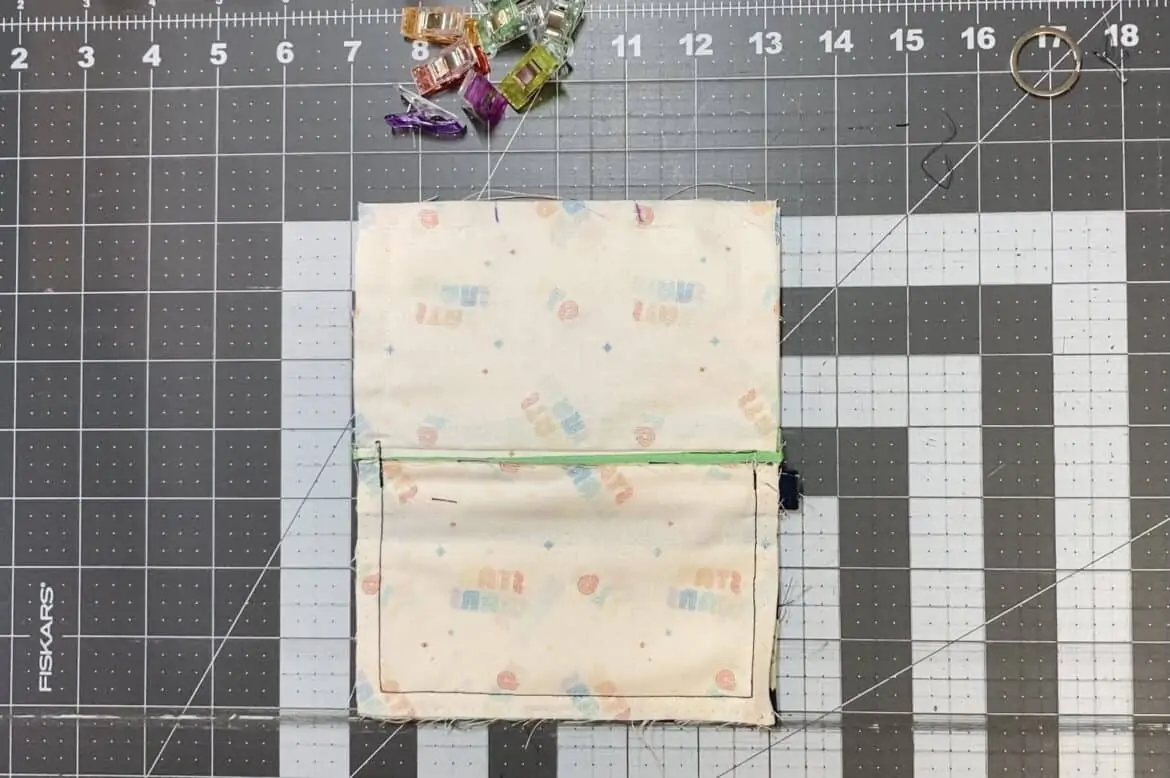
Trim this front panel piece you just made so that it measures 6” wide by 4 ¼” tall.
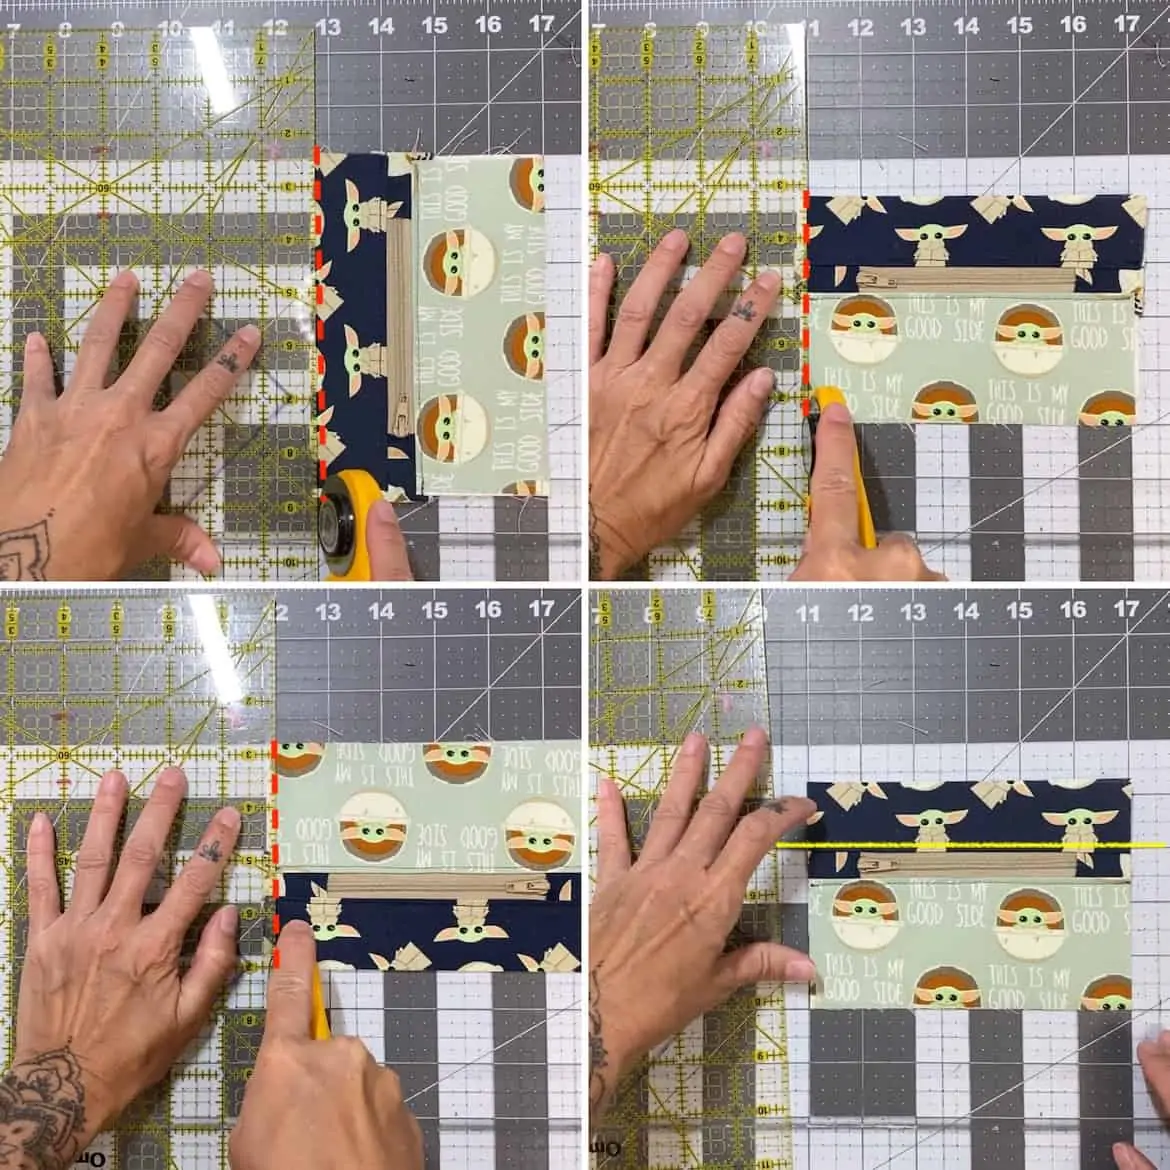
I like to align my top topstitch to any line on my cutting mat (the yellow lines) so that I have a straight baseline to trim from.
As an example, I’ve marked up the untrimmed piece from above so you can see how I would trim it down.
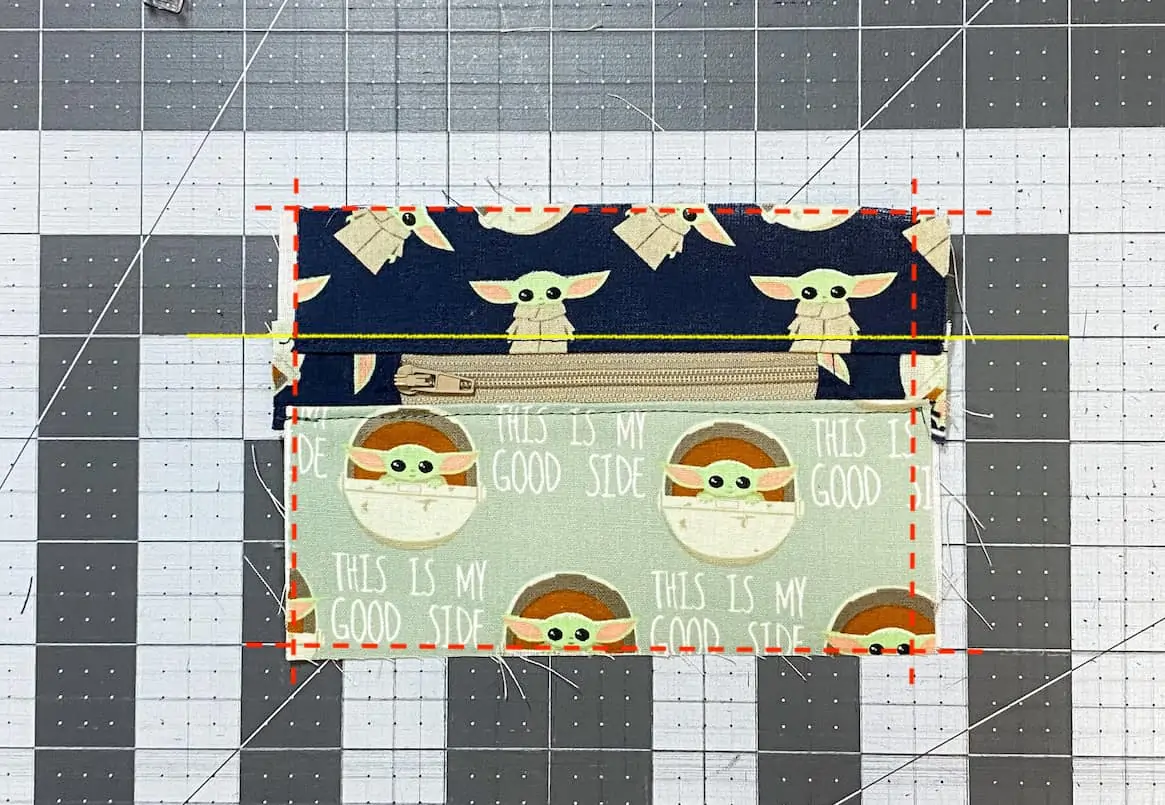
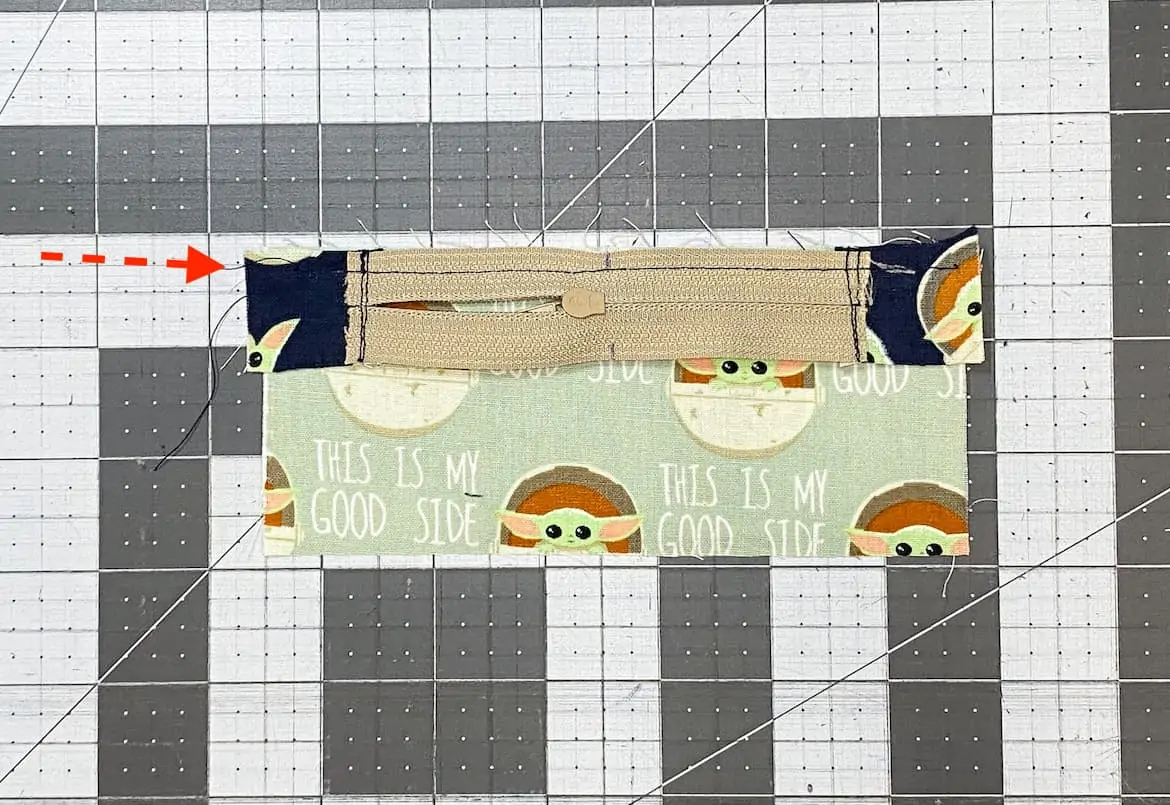
Place this on top of the front pocket back panel lining piece, both face up.
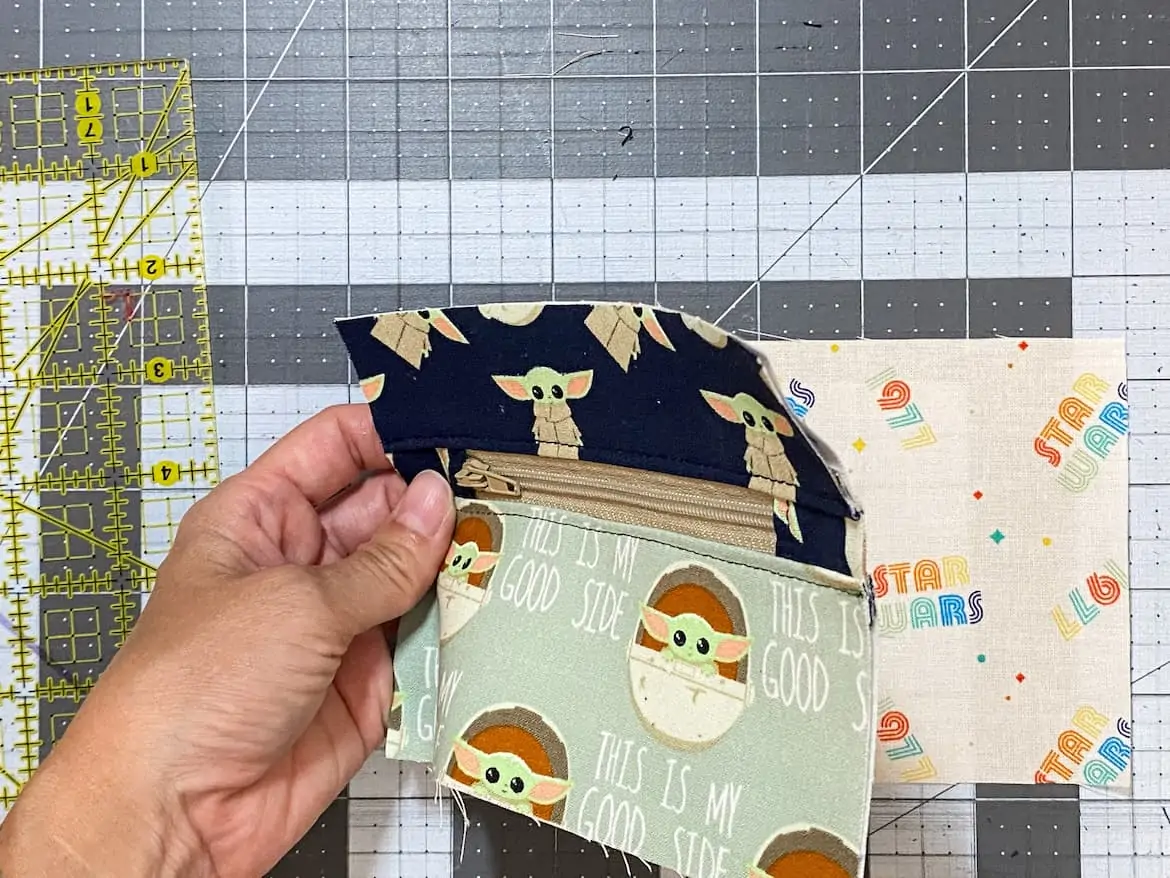
Clip all the way around.
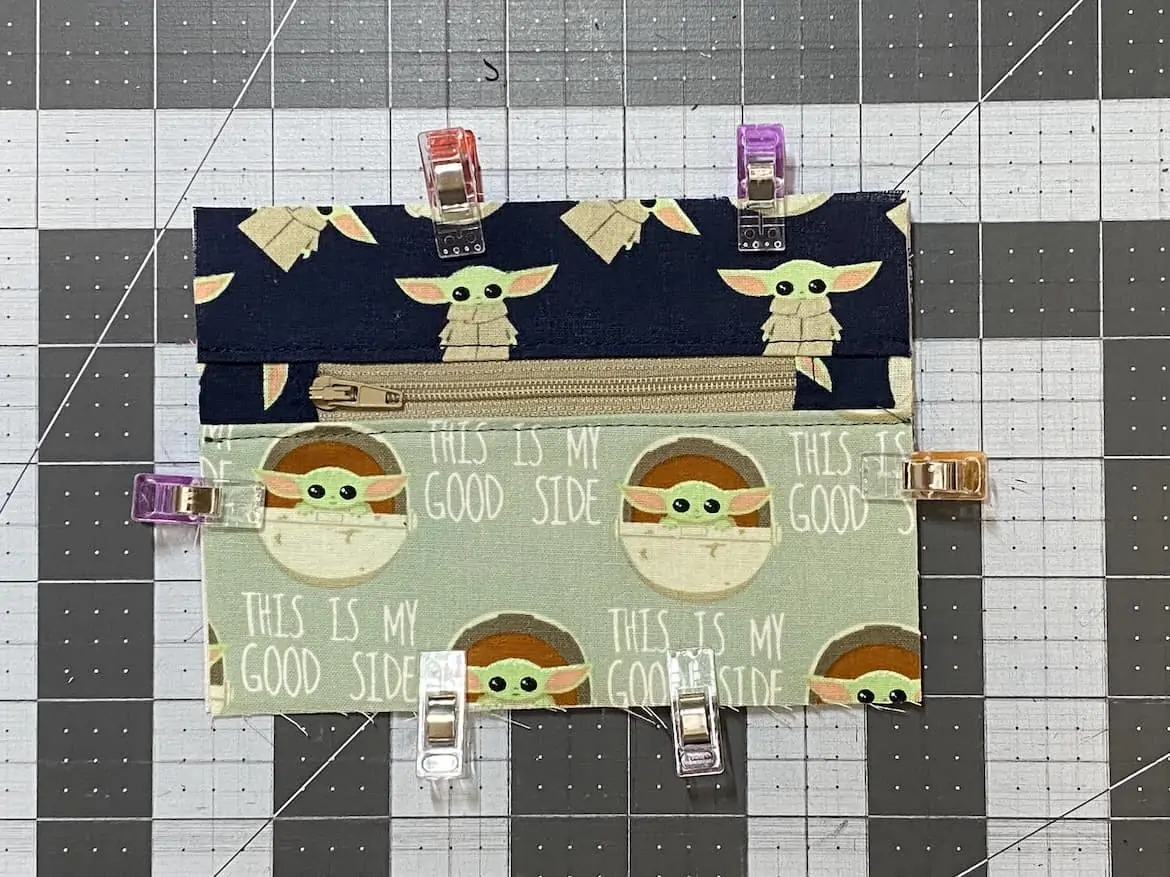
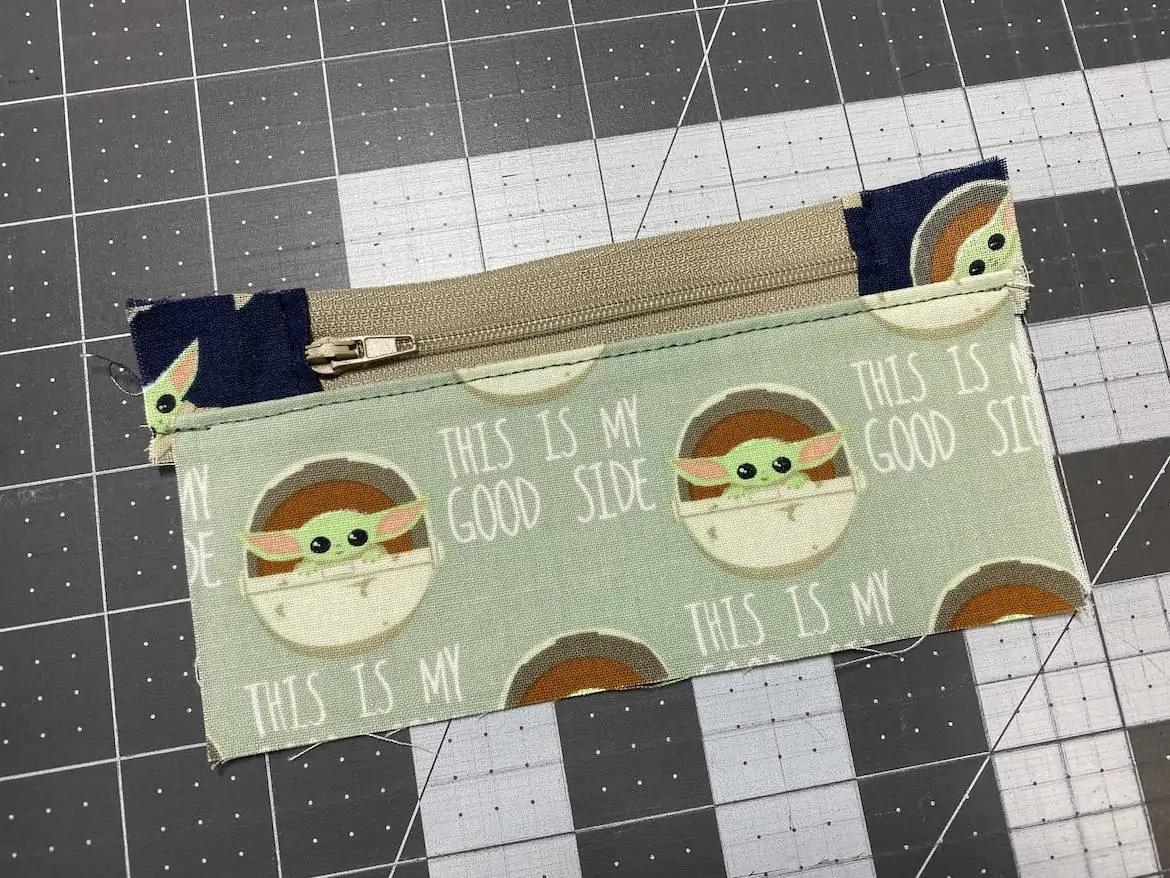
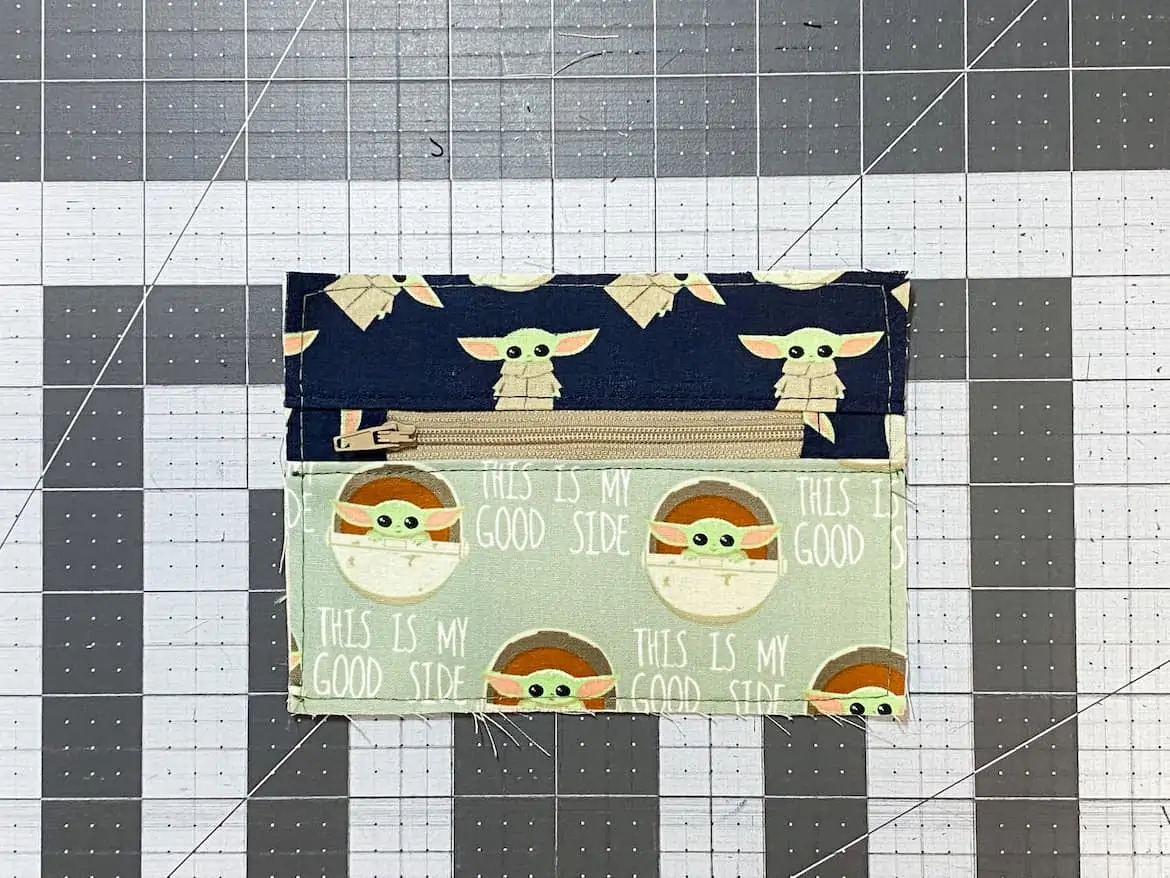
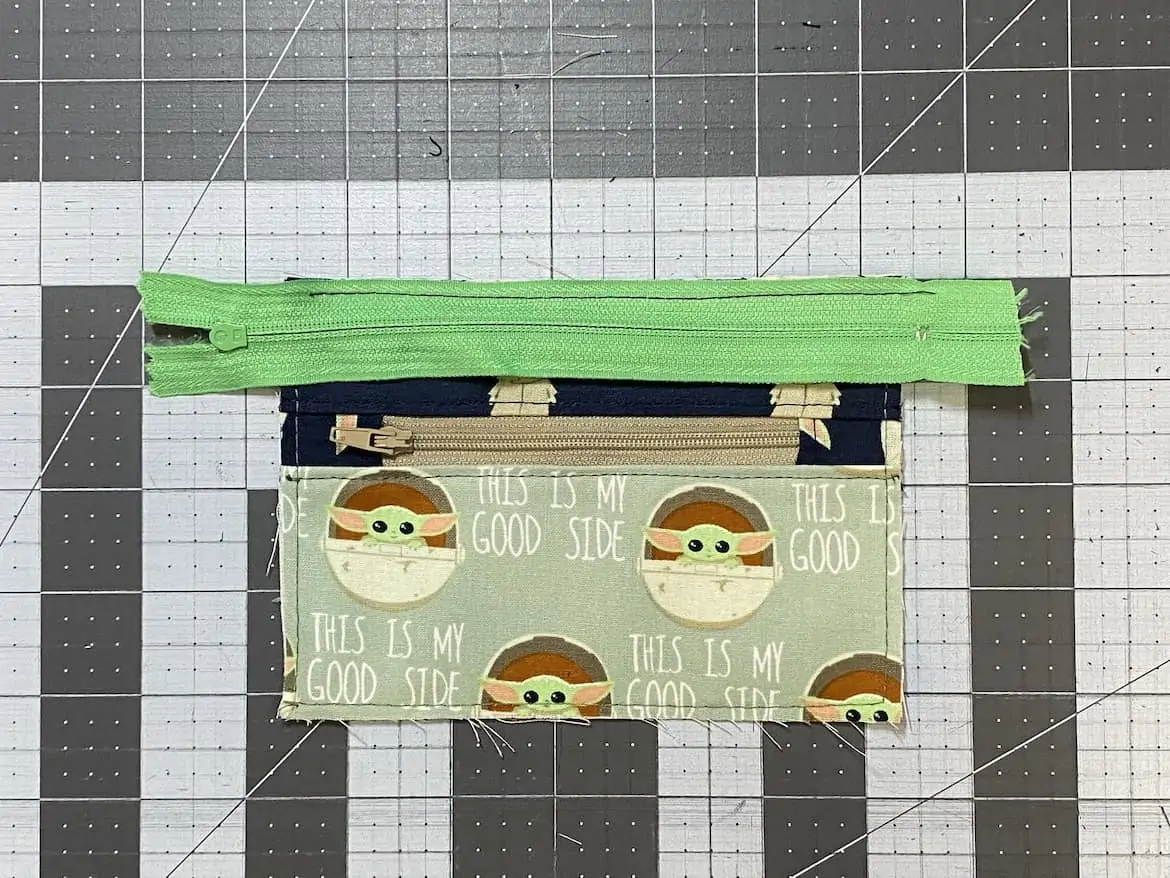
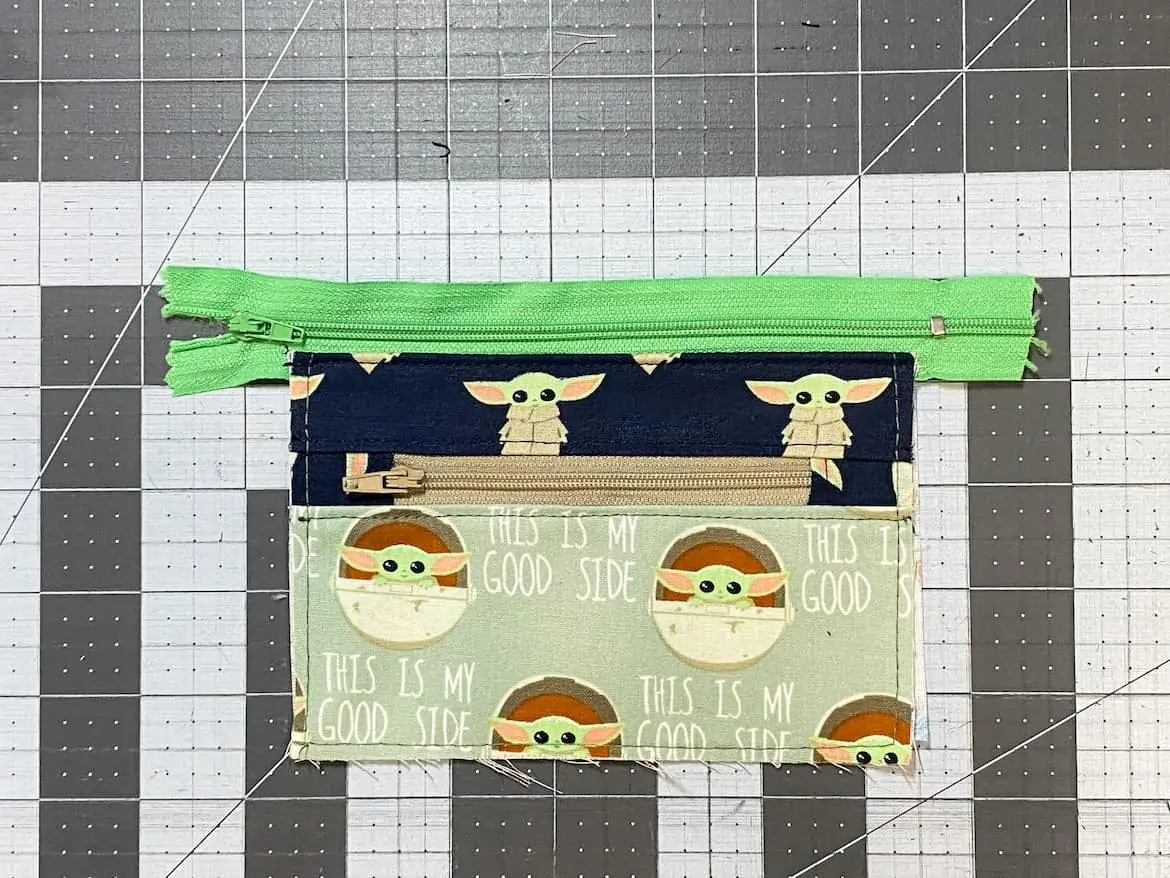
Baste together by sewing completely around all 4 edges using ⅛” seam allowance. You now have a complete front panel piece with a functioning zippered pocket.
I like to test the zipper (again) here to make sure it works properly. If not, it’s much easier to start over from here than later! I actually test the zipper constantly.
I want to make sure that I haven’t mussed it up somehow along the way, as I HATE pouches and purses with crap zippers – hahaha.
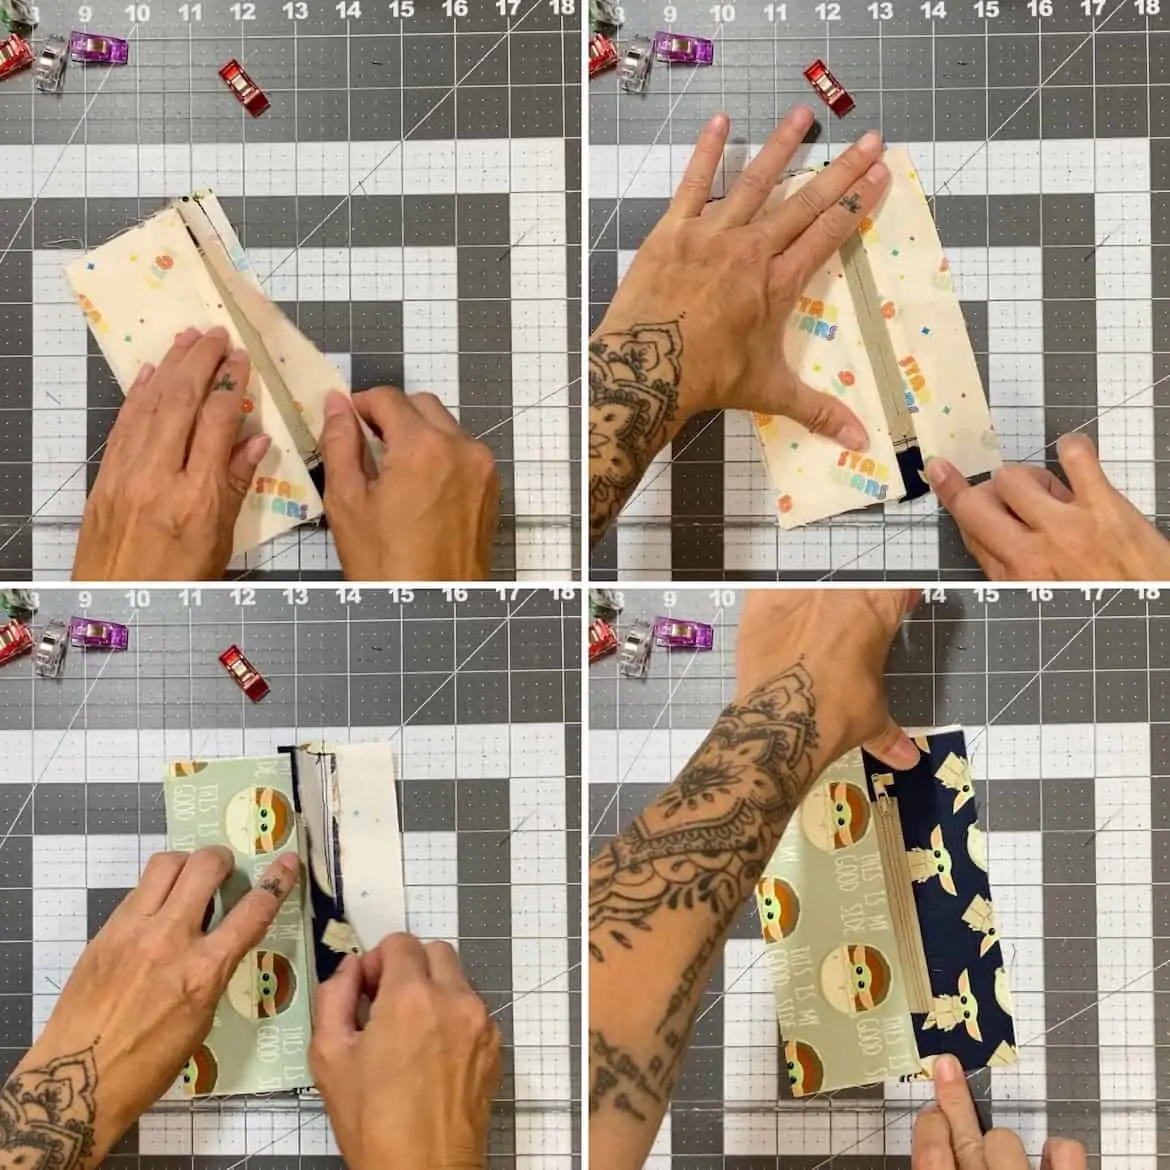
Now grab that longer main zipper and place it face down along the top edge of the panel you just made.
TIP: Notice how the zipper pull (on the left) and the zip stop (the small metal piece on the right) are both off the edges of the fabric.
- The metal stop on the right will be cut off later. Don’t worry, you will be sewing a new stop so you wont need it. But do be sure it is off the edge like so because you don’t want to accidentally sew over it later. It will break your needle and give you quite the scare!
- A 7″ nylon zipper is the minimum size I like to use because allows me to hang the zipper pull as far off to the left as possible so it stays out of the way when I’m sewing. This way I don’t have to constantly stop and move it out of the way while I’m sewing (like you had to do earlier).
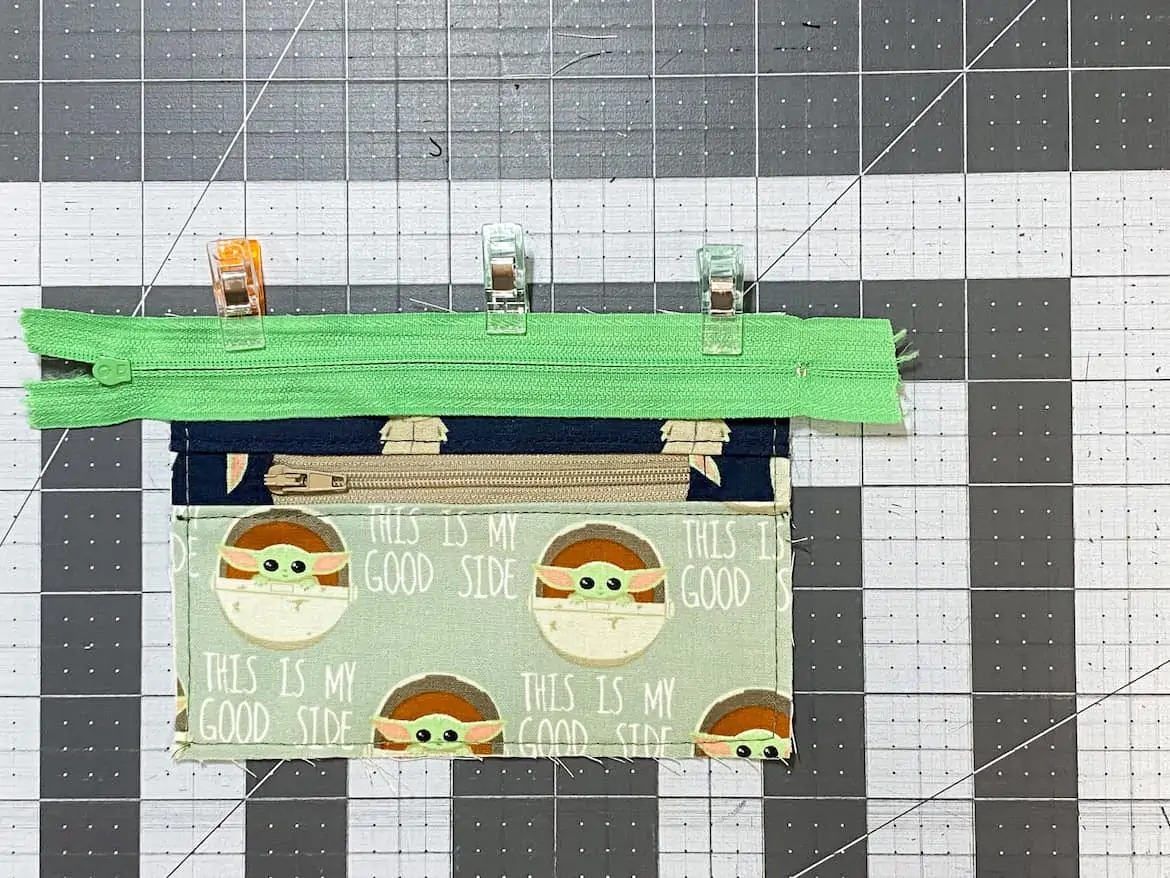
Baste in place like earlier.
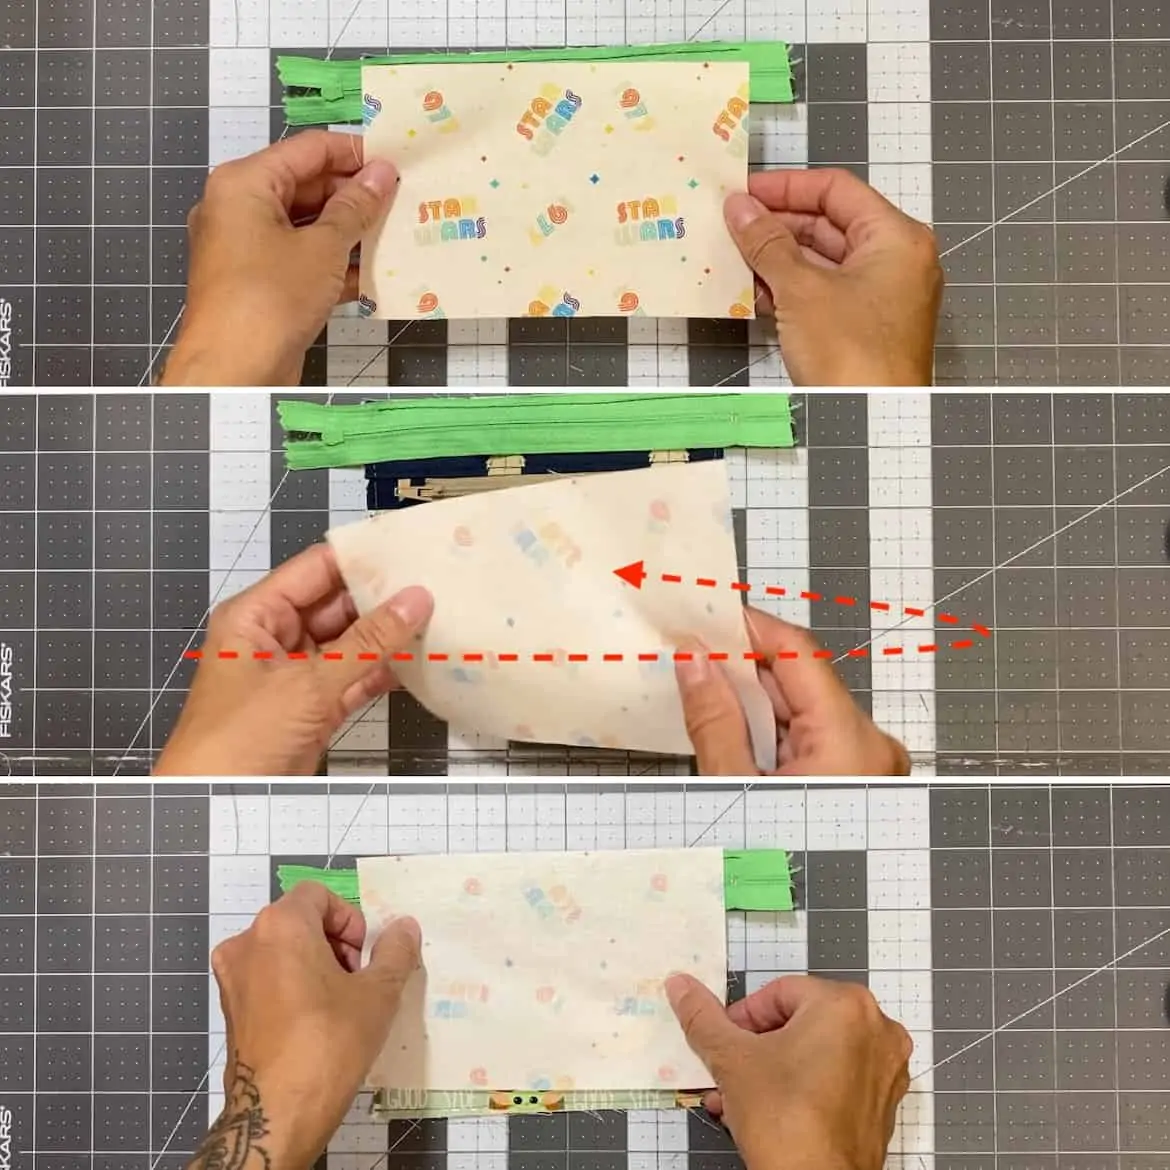
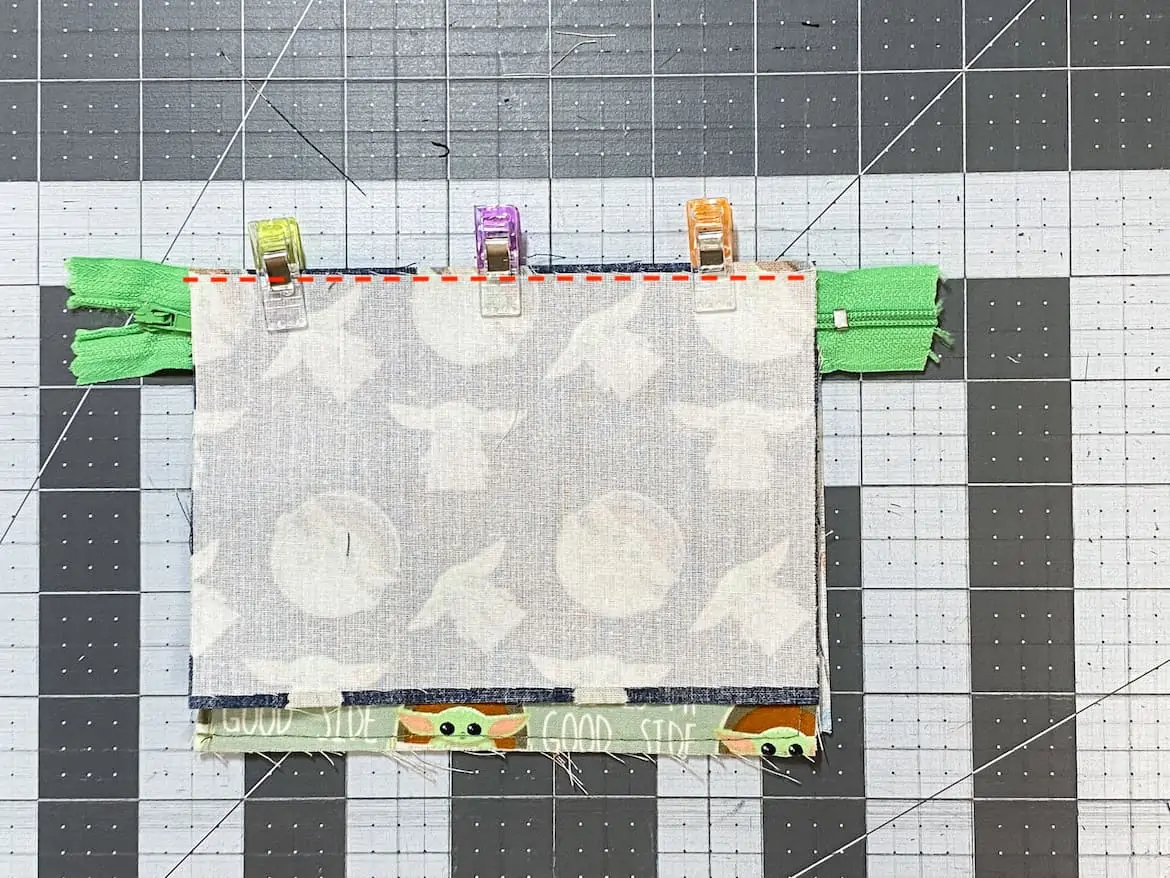
Place one of the main pouch lining pieces face down on top of that so that the right sides of the exterior panel and the right side of the lining piece are facing each other.
Again, you’ll want to check for the correct direction if it matters for your lining piece. This time, you want the lining piece to be right side up.
To do this, hold the fabric in the direction you want it to be, then turn it over (in a right to left direction) and place it on top of the zipper like so.
Sew all three pieces together using ¼” seam allowance and zipper foot.
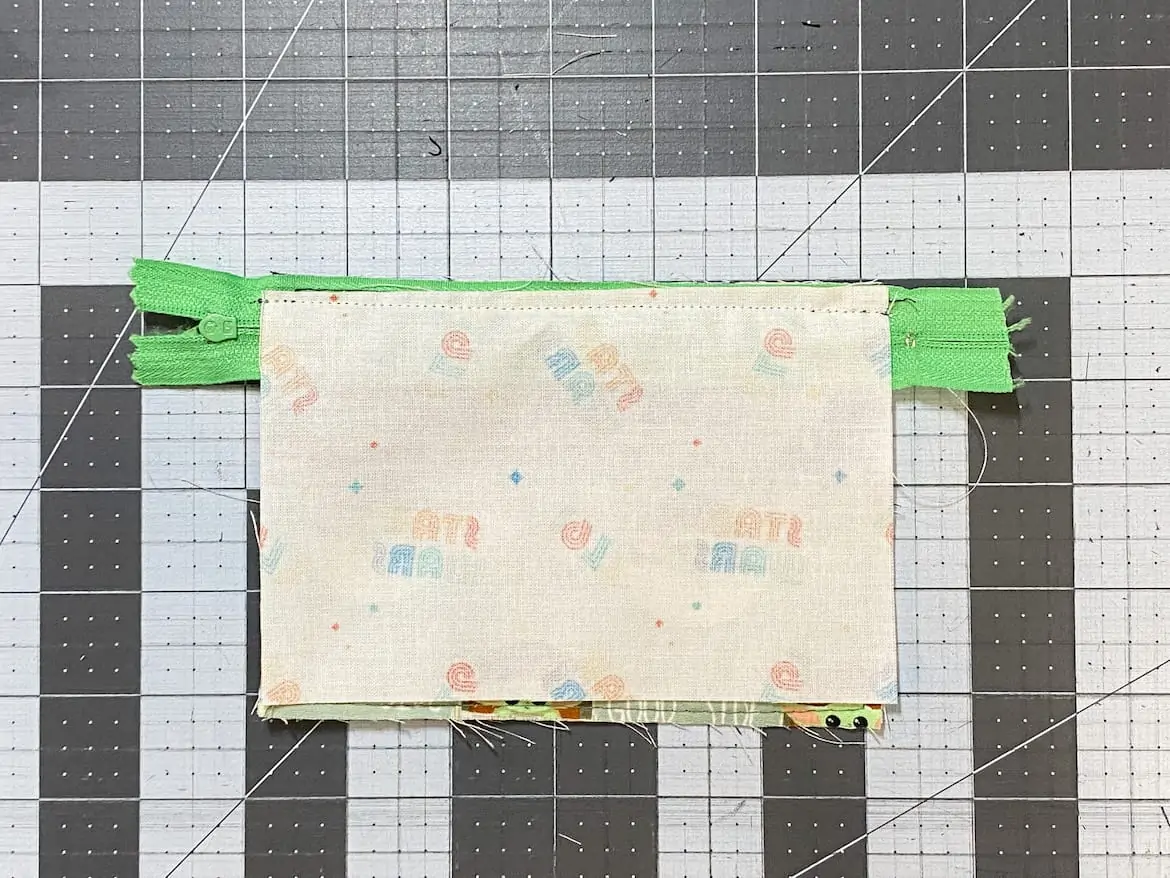
Just like before, press open and topstitch with ⅛” seam allowance.
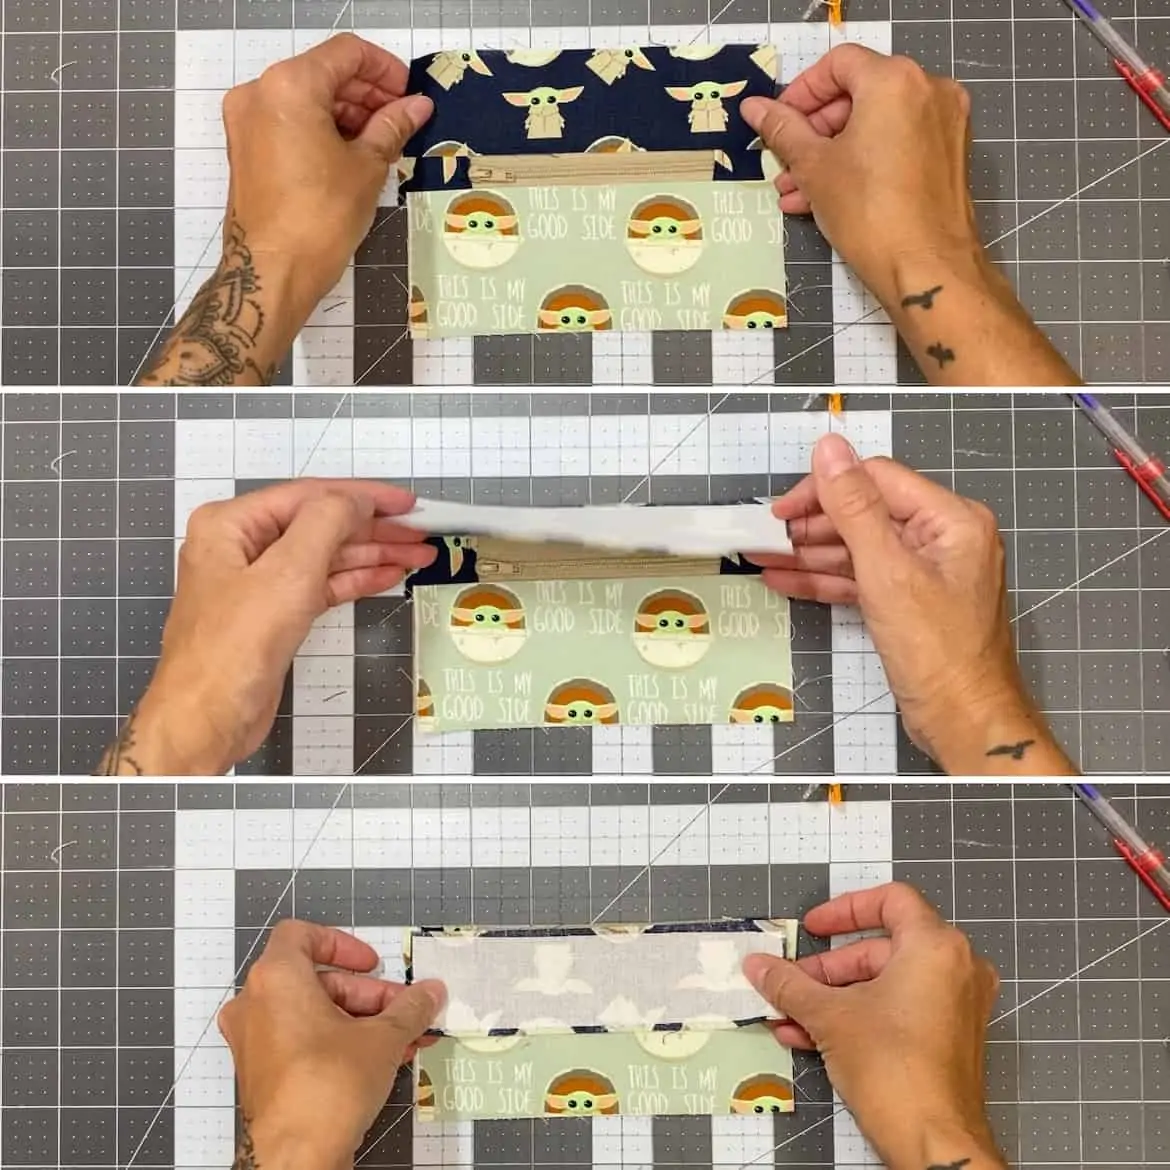
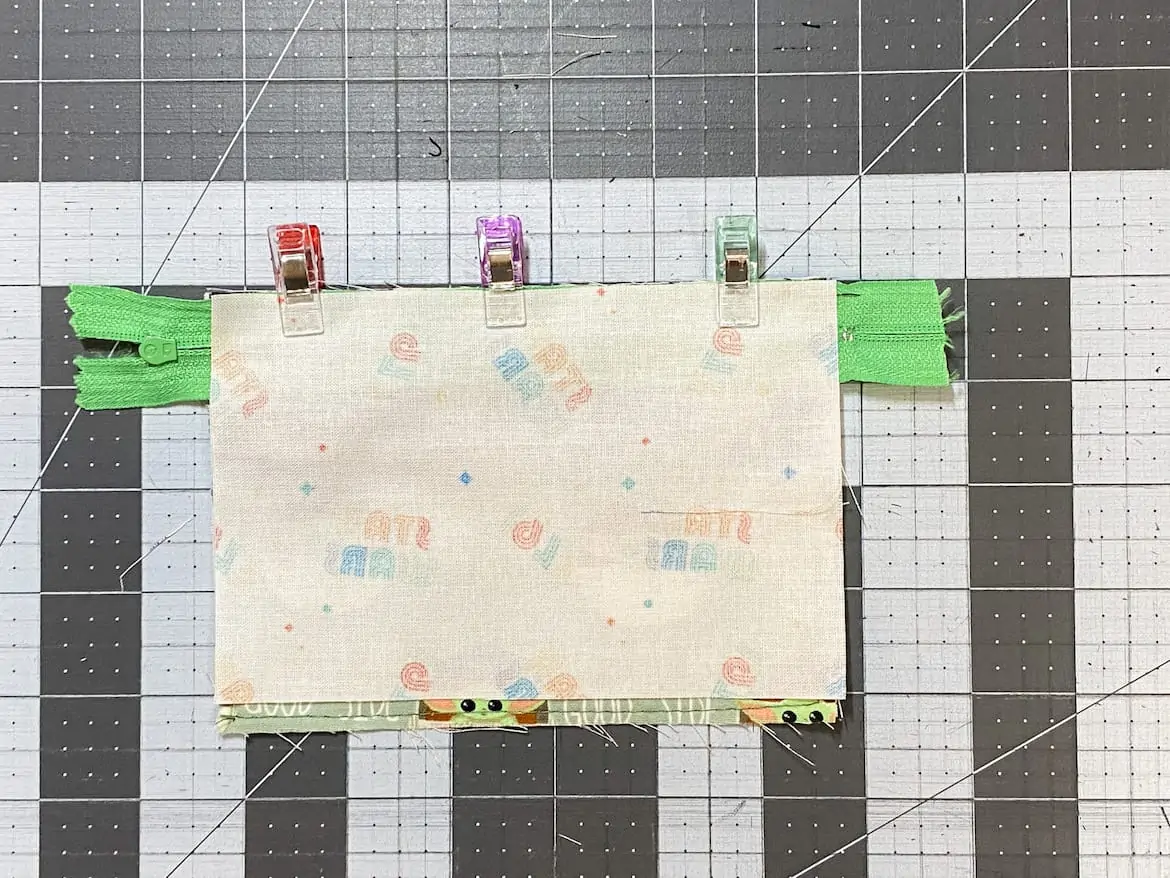
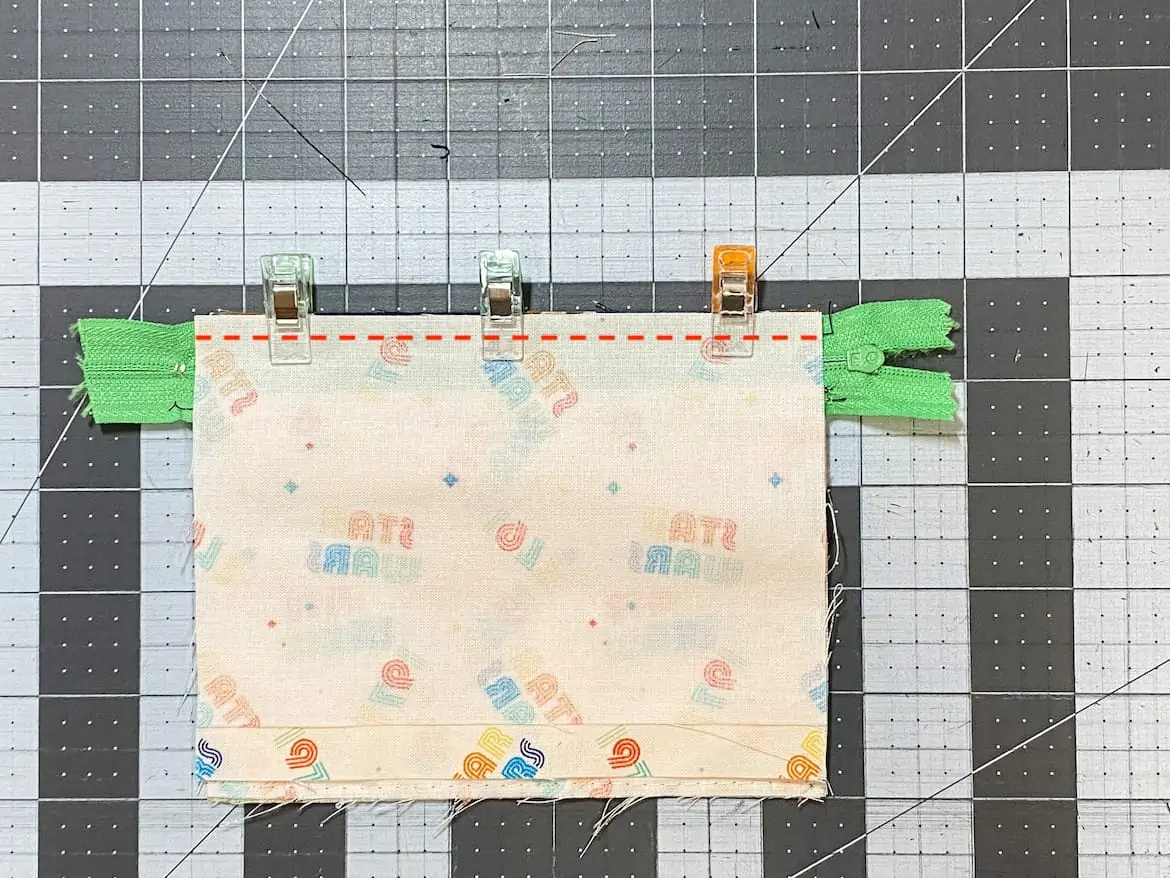
Place the back panel main fabric piece on top, face down aligning the top edge with the open edge of the zipper tape below. Clip in place and then baste it to the zipper using 1/8″ seam allowance.
Flip this over so that the lining side is now face up. Place the second main lining piece face down also aligning with the open edge of the zipper tape.
Clip in place and sew all 3 pieces together using a ¼” seam allowance.
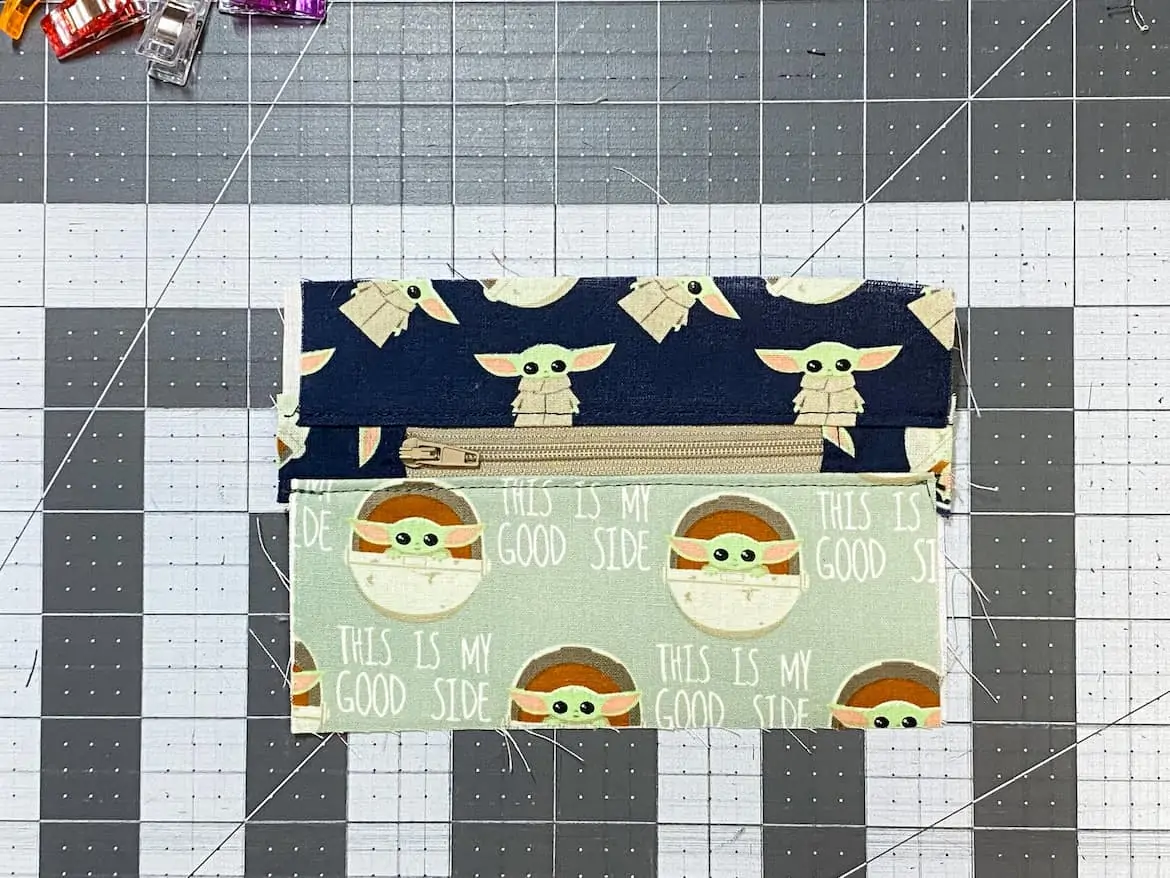
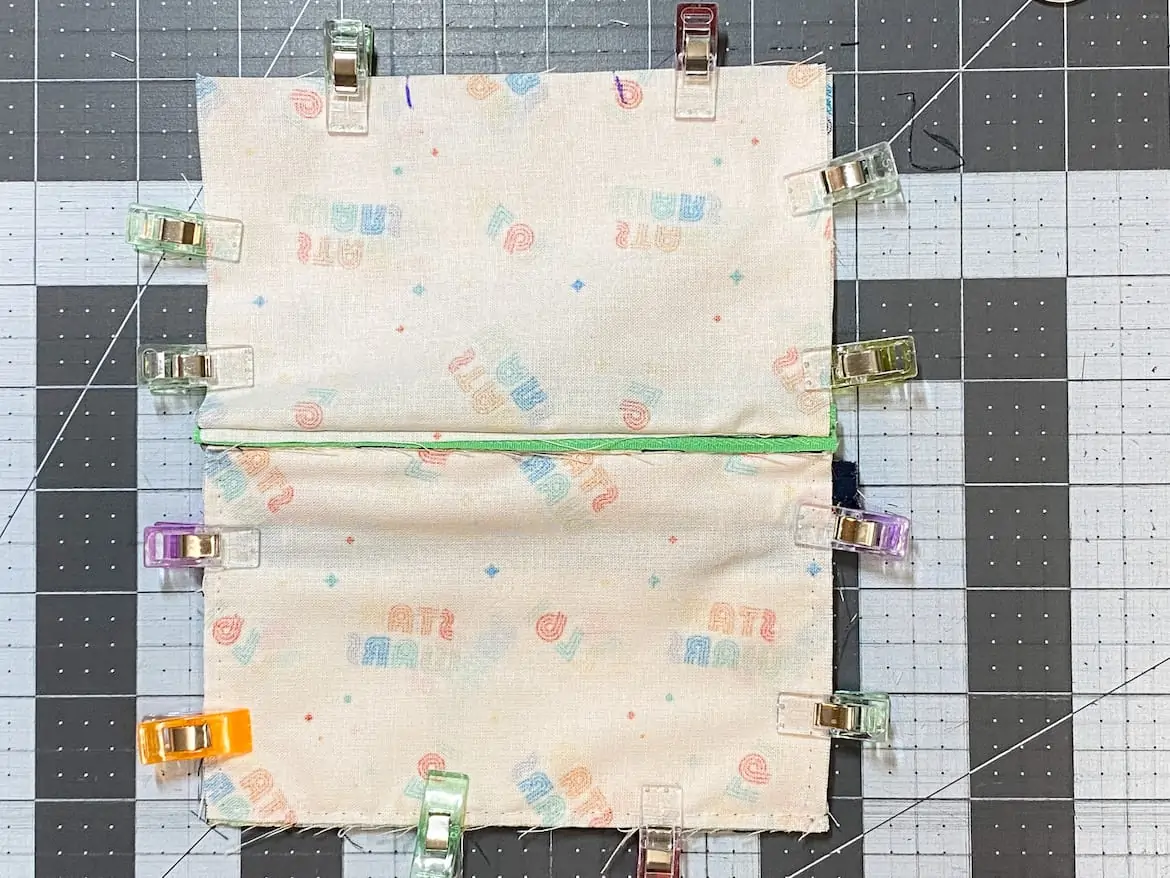
Open both sides, press and topstitch like before so that now you have a front panel with lining along with a back panel with lining on either side of the main zipper.
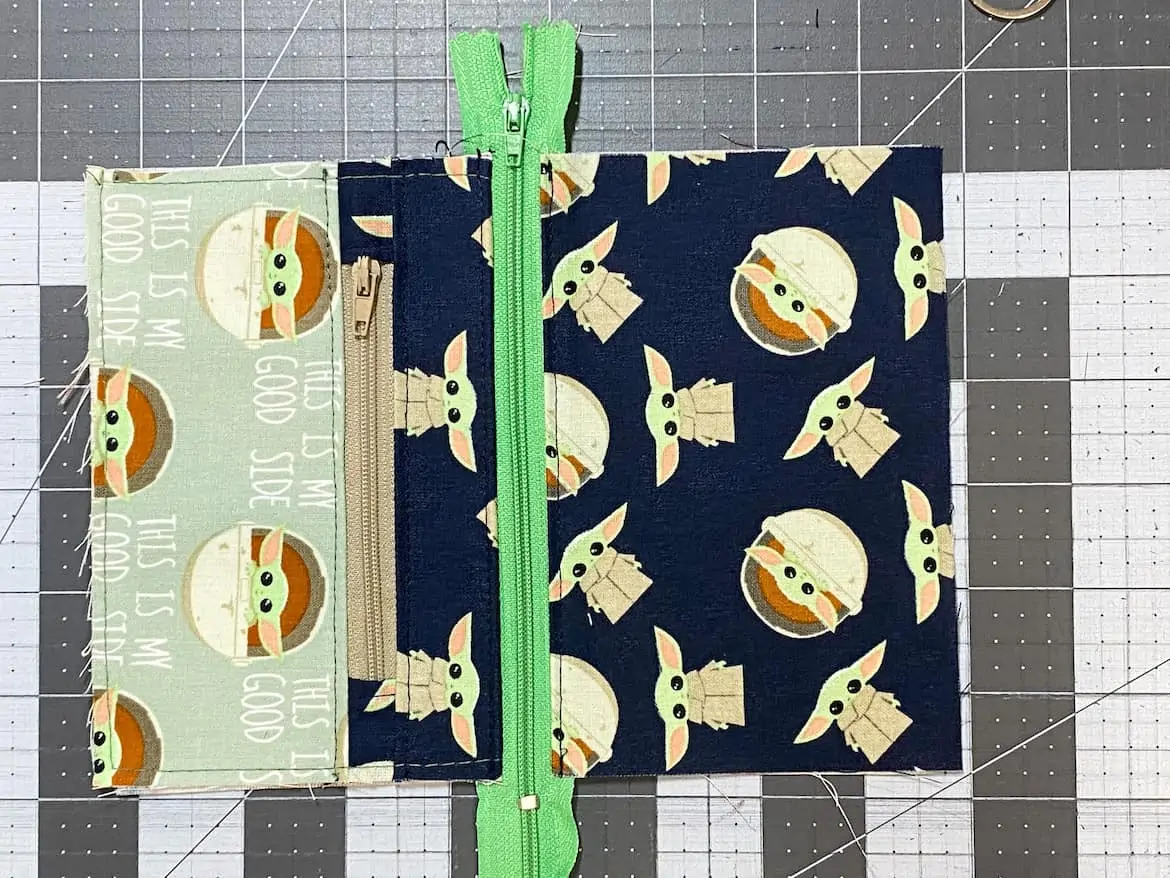
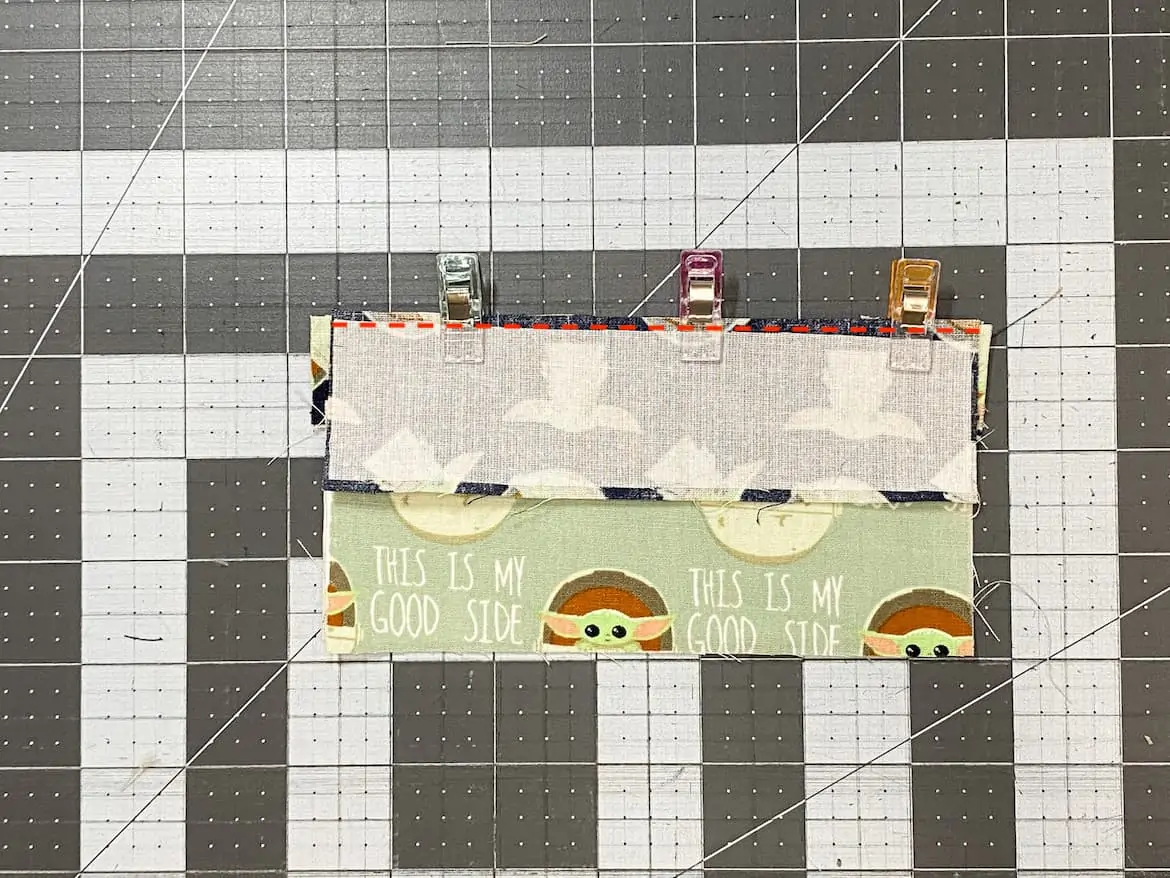
Move the zipper pull into the center and then stitch the zipper tape together at that end.
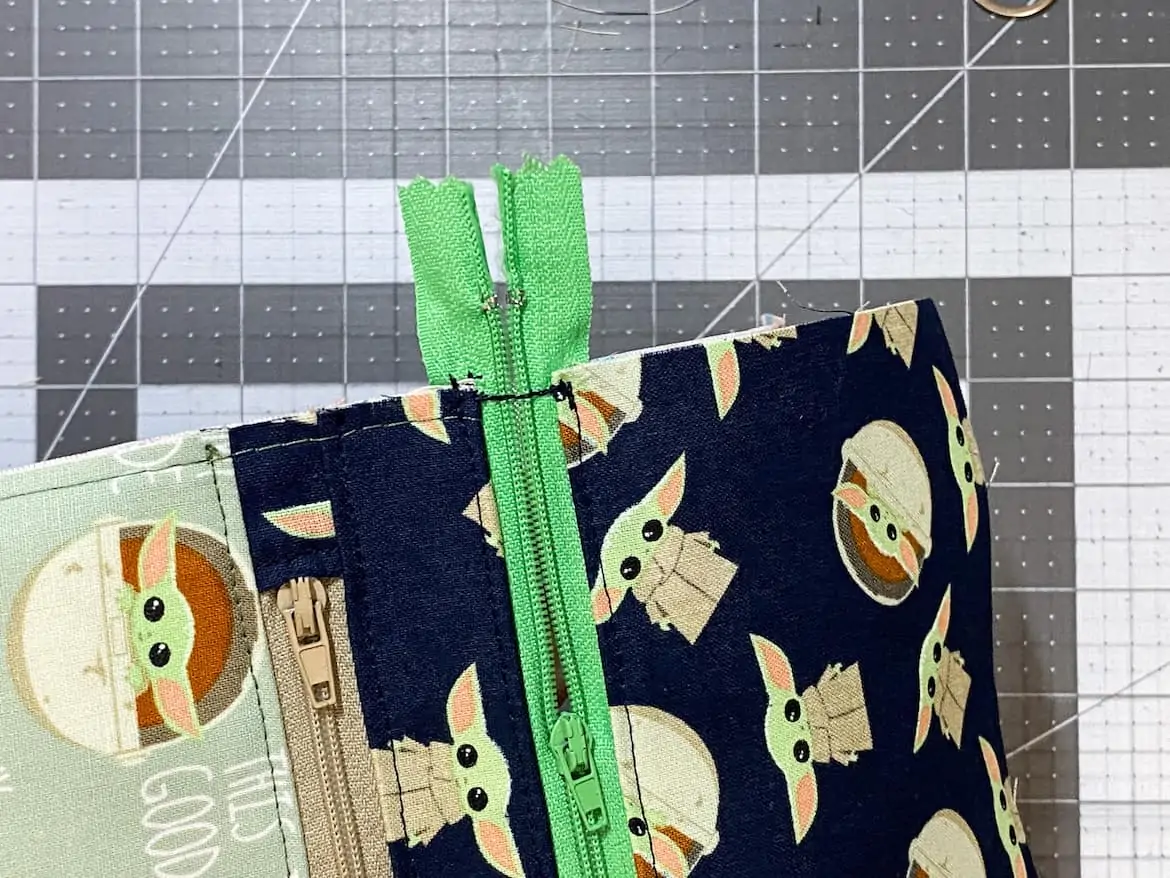
Trim the zipper tape on both sides so that it is even with the fabric.
IMPORTANT: Move the zipper pull so that it's almost all the way open (you need this space open so you can birth the pouch later).
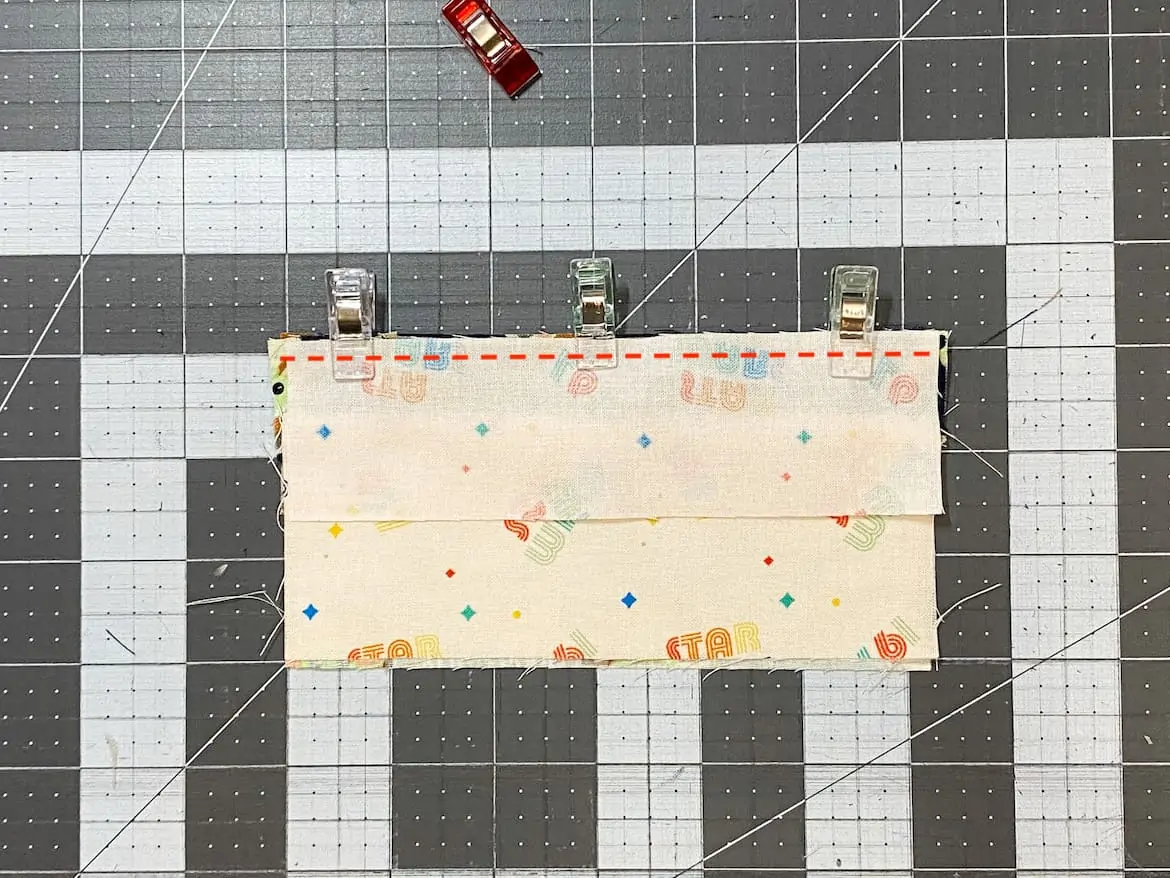
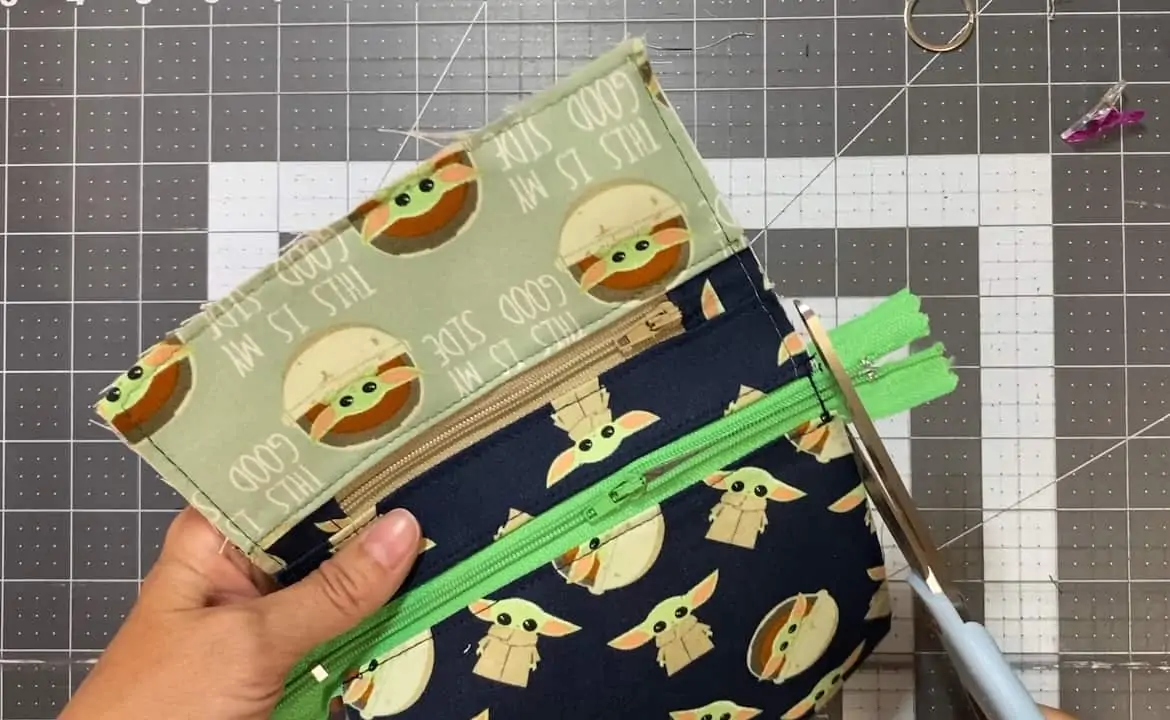
Match the lining pieces together (right sides together) and match the outer pieces together (the back panel and the front pocket panel piece you made) also right sides together.

IMPORTANT: For the cleanest looking zipper, you want to make sure the zipper teeth are pushed towards the lining side and that the zipper tape and seam allowances are facing/folded towards the exterior side like below.
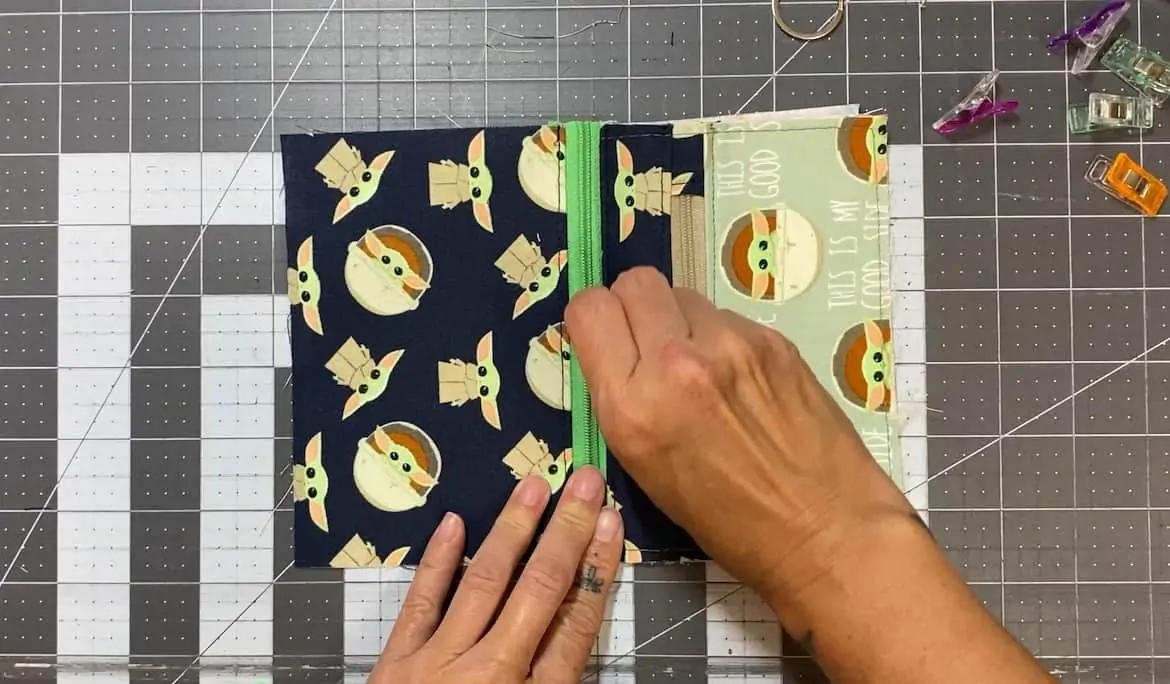
Clip all the way around. Mark for a 2” opening on the lining pieces.
Fold the ring tab piece you made earlier in half and place between the outer pieces close to the zipper tab.
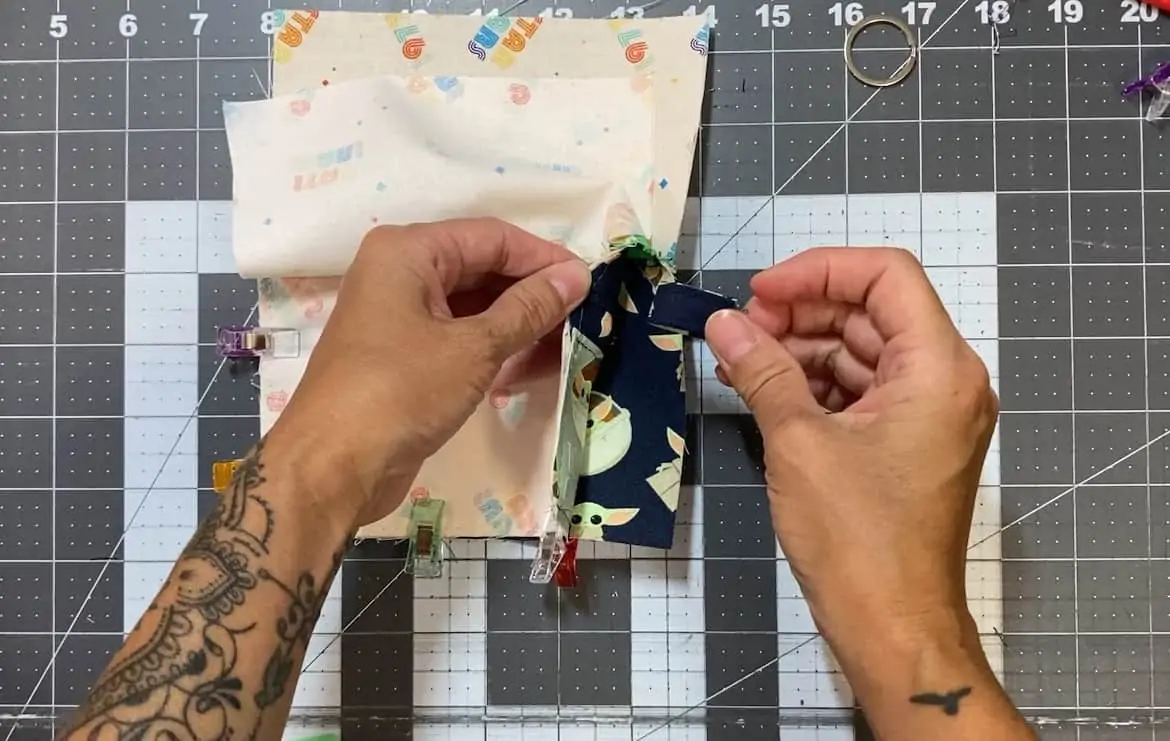
The raw edges should be sticking out with the loop part being hidden inside the sandwich.
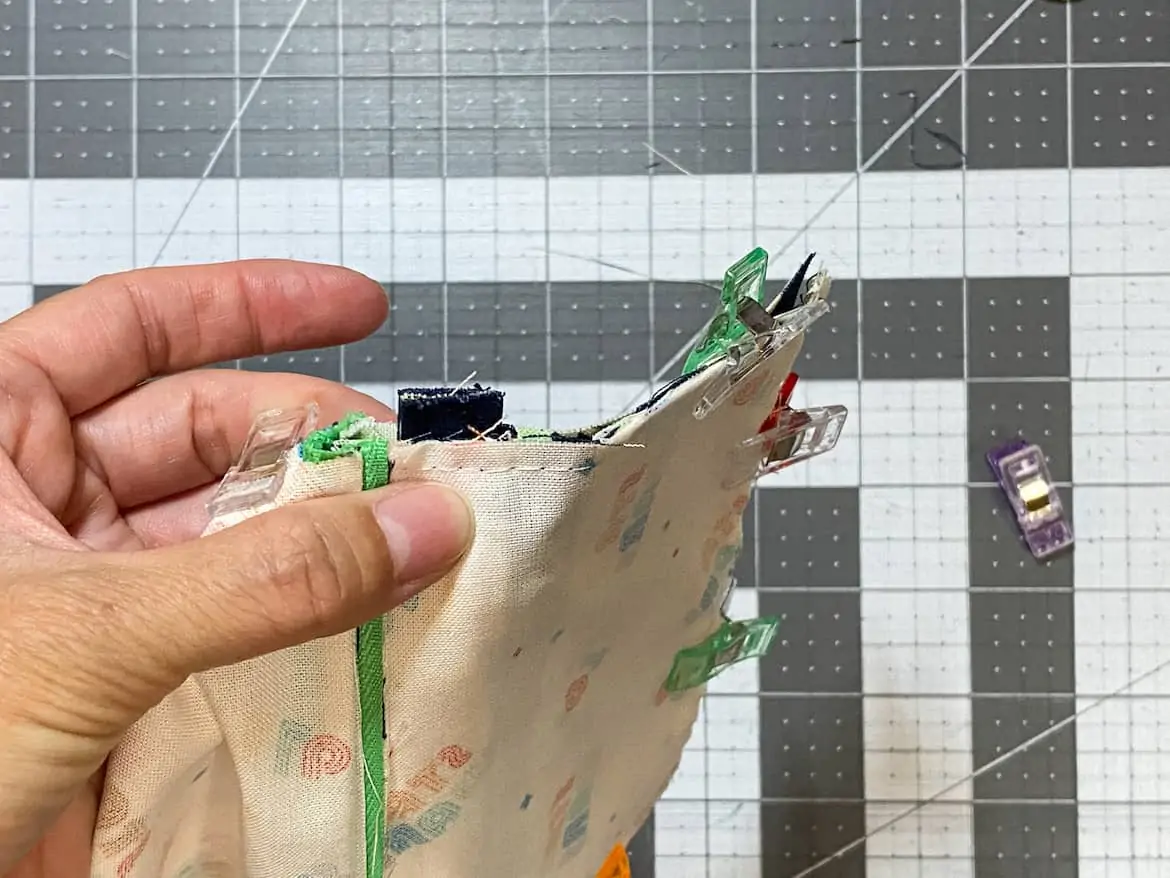
Sew all the way around (except for the 2” space for turning) using a 1/4-3/8” seam allowance, whichever you are comfortable with. Newbies should use a 3/8″ seam allowance.
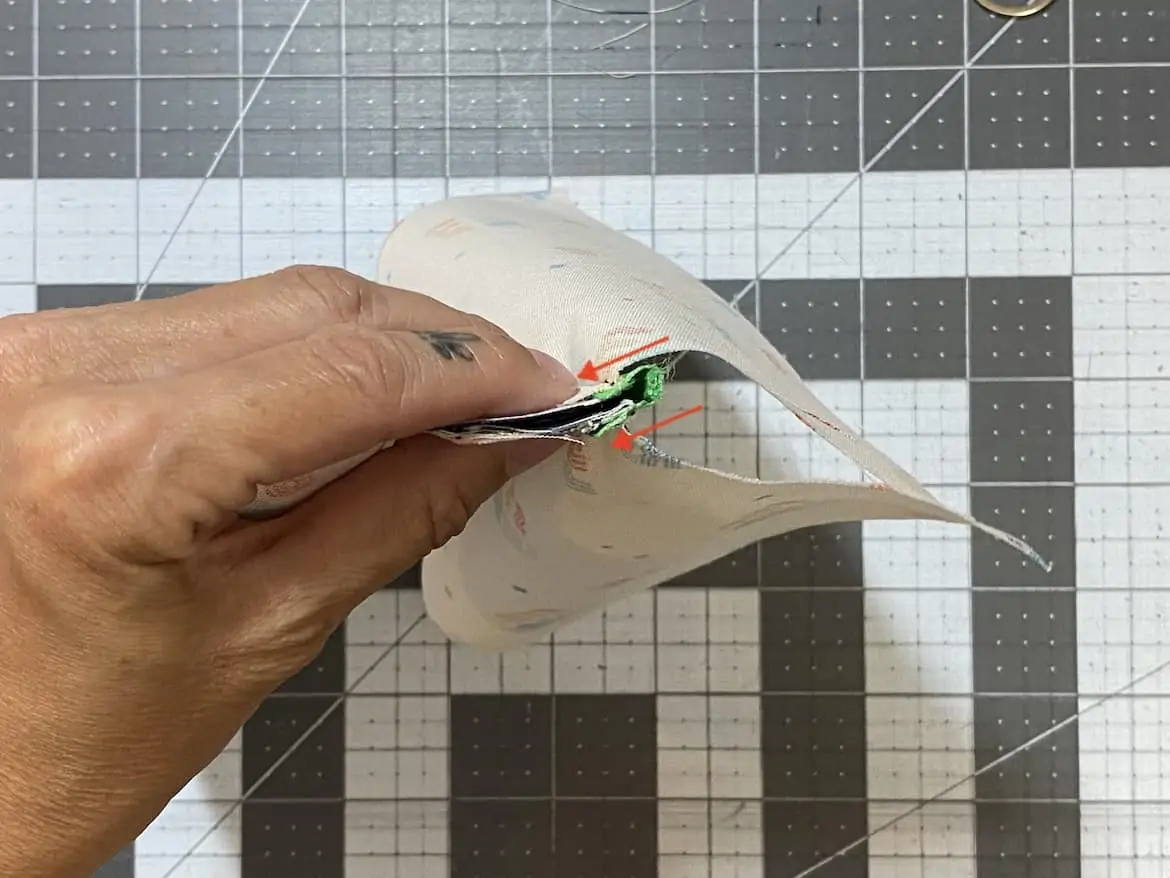
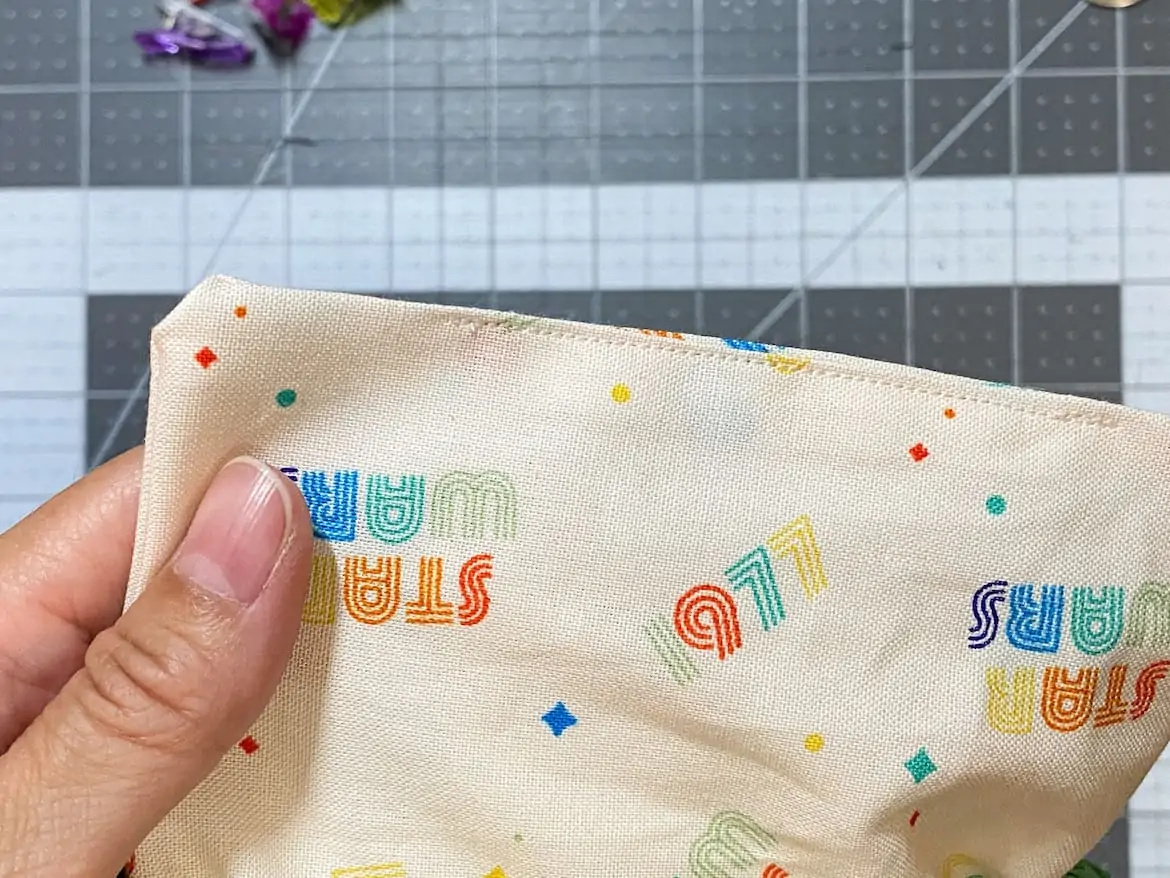
Cut off the corners, but be careful not to snip the seams. Doing this makes neater finished corners.
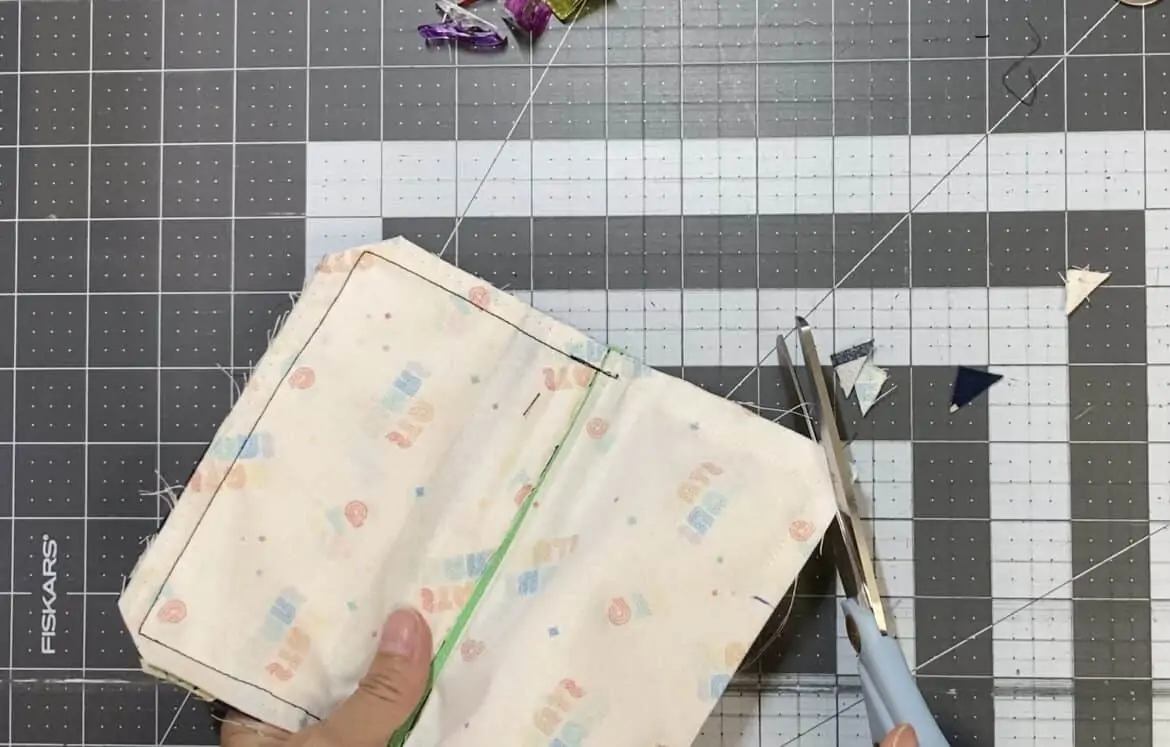
Put your fingers inside the hole, grab the bottom seam of the exterior side and pull the outside piece through. Keep going until your piece is now right side out.
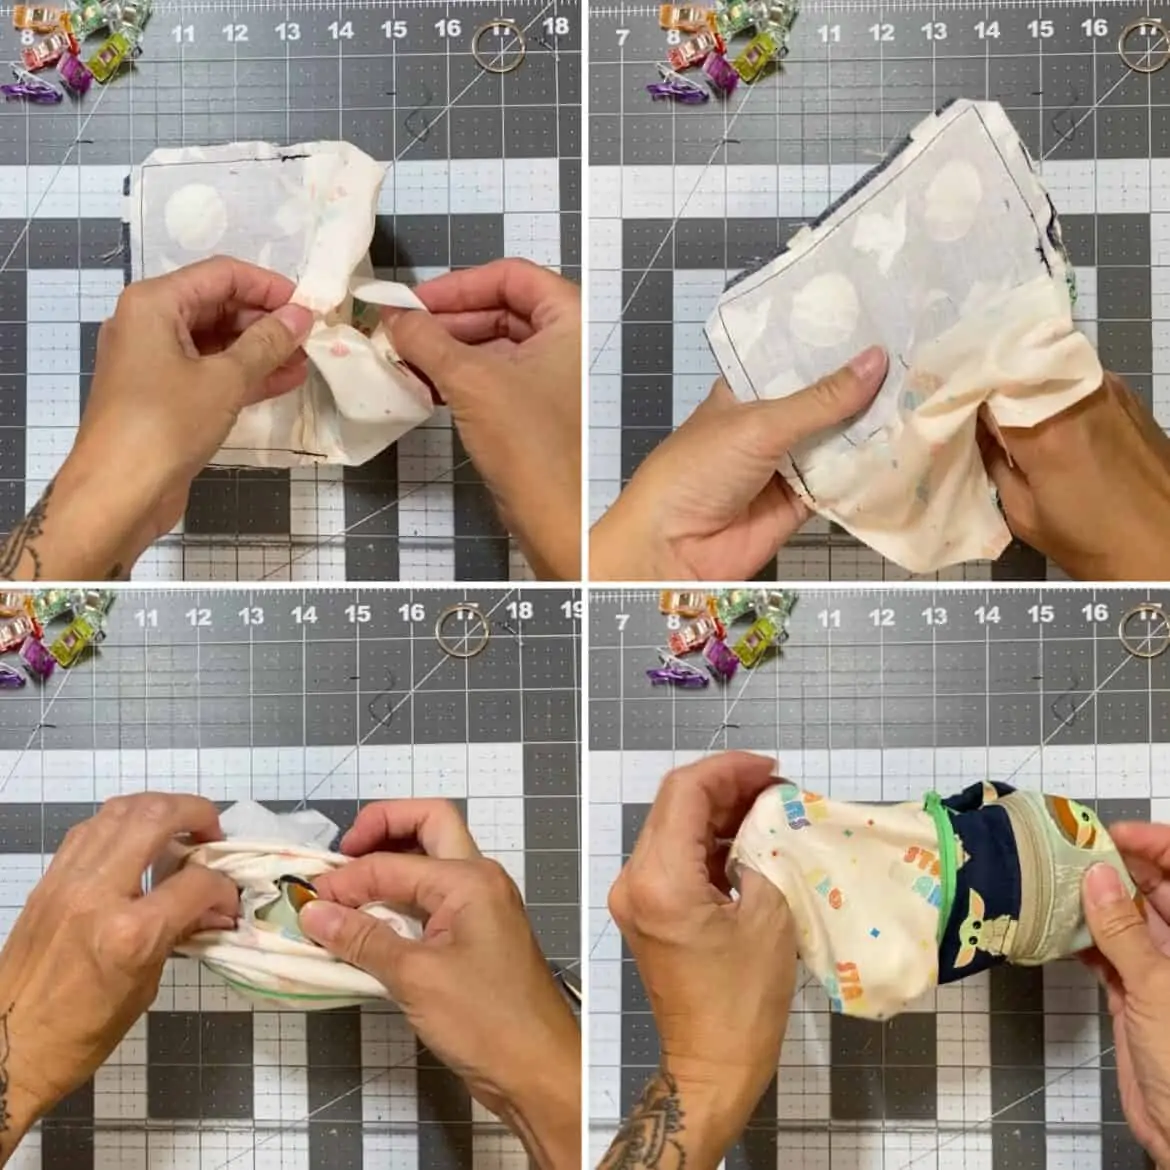
Use a point turner tool (or a chopstick works too!) to gently press out all 4 corners. Press the exterior pieces with an iron.
Align the lining hole pieces that are folded in and press so they match as best as you can. Mark just past the opening on each side so that you will be able to easily see where to start and stop sewing the hole shut.
Sew the turn hole shut as close to the edge as possible.
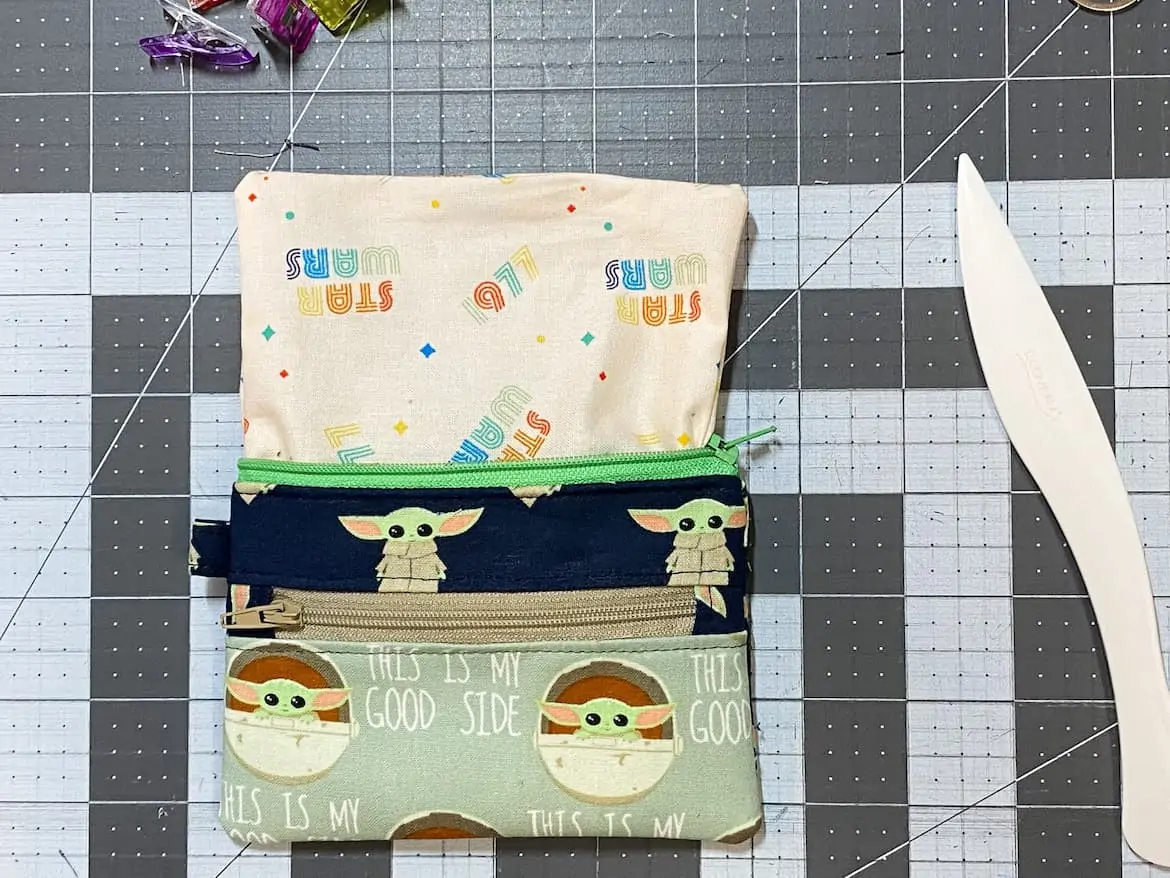
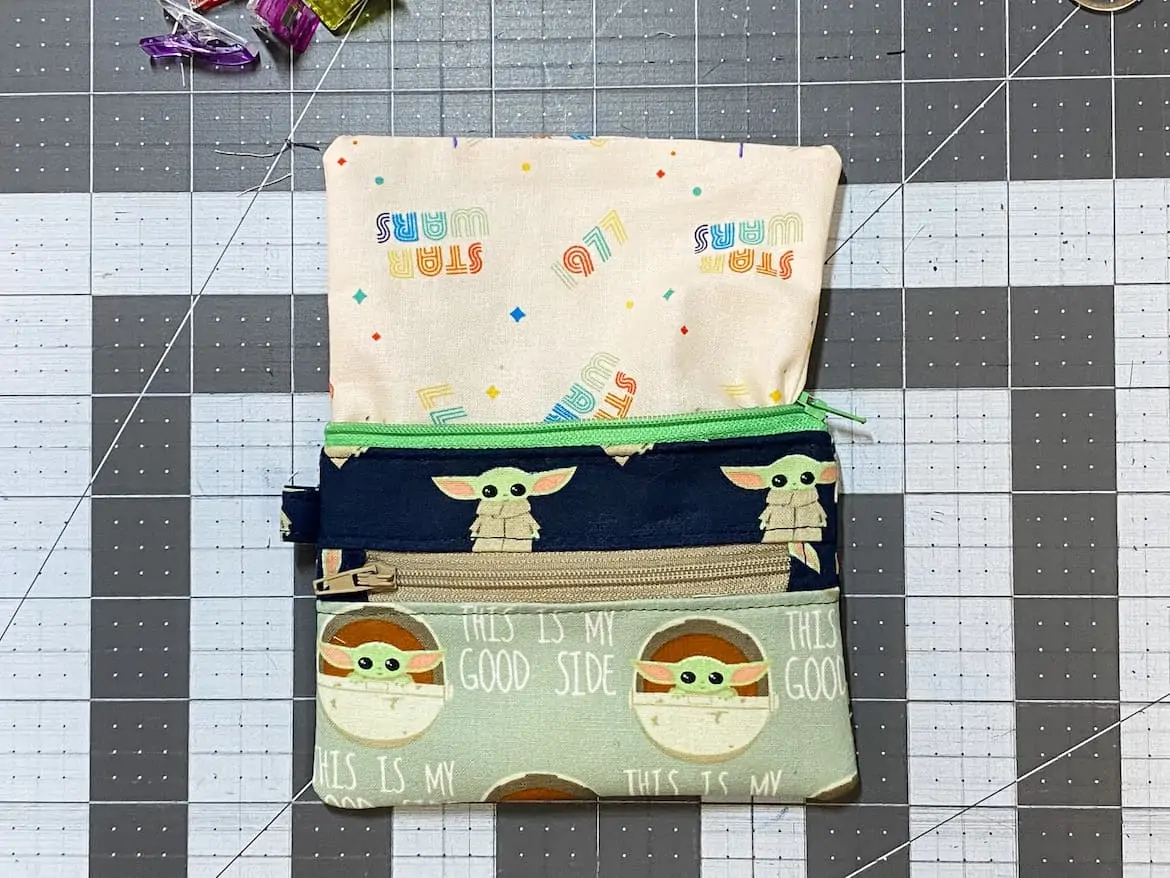
Push the lining into the exterior pieces and push in the corners with your fingers. Close the zipper and attach the 1” split ring to the tab. You’re all done!
I hope you enjoyed this free DIY Coin Purse pattern. What would you like to see next?
Try one of our other crafts!
[wp_show_posts id=”103417″]