If there is one thing all travelers can agree on, it’s that we all seek authenticity.
We want to experience authentic cultures, experience authentic moments and share authentic travel stories.
Some might say that their travel photography offers the most authentic stories, but is that really the case?
Is a posed photo of your children at the beach an accurate representation of the crying fit that ensued not five minutes earlier from saltwater in their eye?
Or the way they hate the water but could spend hours building castles in the sand?
Part of sharing our authentic stories involves capturing photos in a way that tells the story of the complete adventure, not just the postcard smile moments.
Candid photography is an art in itself.
Otherwise boring moments can be brought to life with an interesting angle, and events that happen in a blink of an eye can be slowed down to capture one pure moment of joy.
It won’t be easy and you’ll probably hate and delete 99 percent of the candid pictures you attempt to take, but believe me, the 1 percent you keep will all be worth it.

Here are a few tips to help increase your travel photography game including how to take better pictures, along with candid photography tricks and secrets.
How to Take Better Pictures of Your Travels
Once you know the correct camera settings and a few photography tips, you’ll be well on your way to capturing some really great travel moments that will evoke emotion, rather than just show a series of stale posed shots.
We’ve all heard the saying, “A picture is worth a thousand words,” but can this be said of every photograph ever taken?
Probably not, and in the case of family vacation photos, it’s probably even less likely that any of those meticulously arranged shots would satisfy this idiom.
While smiles and eyes directly looking into the camera can be lovely, how much of a story does the photograph tell on its own without any explanation from you?
Wouldn’t you love for your shots to truly express a cherished vacation memory and tell their own tale? How does one go about making their photos be worth a thousand words?
Well, one easy way to accomplish this is through candid photography.
If you’re ready to ditch the straight-on smiles but aren’t sure where or how to start, here are some tips that will get you on the right track.
Start with the Correct Settings
Your DSLR and even some higher end “point and shoot” models have a variety of settings to choose, from full automatic to full manual.
The first step to better travel photography is ditching the automatic mode. I know, it’s scary!
The moment you start capturing really amazing photos is the moment you step outside of your comfort zone and vow never to use the fully automatic mode on your camera again.
As an example, most professional photographers will switch between using one of three modes – aperture priority, shutter priority and manual.
TIP: Use aperture priority for depth of field focus and shutter priority for action shots or long exposures with a tripod. Get 5 tips on how to use a tripod from a pro.
The aperture of a camera refers to the opening of a lens that lets in light to the camera’s sensor.
With the aperture priority setting, you can tell your camera that you want to take control of and place priority on how much light you want to expose your shot to, while the camera will auto-compensate for everything else like shutter speed.
Aperture Priority Mode
Aperture priority mode is especially helpful in low light situations, or when you want to control the depth of field focus in your shot.
For instance, if you have a subject close to you, but you don’t really like what is in the distance behind them, you can set it to your lowest f-stop which will place your subject in focus and blur the background.
If you prefer crisp focus on both the close subject and the background in the distance, then you would use a higher f-stop.
But keep in mind that the aperture and shutter speed are directly related.
If you ask your camera to let in a lot of light in a dark room, this means it will need to hold the shutter open longer in order to gather that much light.
Note that a longer shutter speed will result in blurry pictures if not using a tripod!
Shutter Priority Mode
The shutter priority setting allows you to take control of the speed the shutter closes at, while the camera takes care of everything else.
This is especially useful when you’d like to get creative with your photography.
You can catch light streaks from cars and stars or take a stunning nighttime photo that appears to “glow,” by using a tripod and setting a very slow shutter speed.
When photographing action, such as your children running around or playing fetch with the dog, opt for shutter priority.
Shutter speed indicates the amount of time the camera exposes the sensor to light from your lens.
Note that the faster your shutter speed, the greater your ability to freeze motion, but there will also be less light let in, so this is best used for outdoor and sunny days.
TIP: There is also quite a bit of room for error in this mode, so for a more foolproof way to capture action, try changing your drive mode instead.
Use Drive Modes
Camera drive modes control how often an image is taken when the shutter button is pressed.
Most cameras have at least three drive modes – single shot, continuous shot and self-timer. Some more advanced models also have multiple exposure and high speed continuous shot.
Most of the time, you will want to shoot in single shot mode – where one photo is taken with each press of the button, no matter how long you hold it down.
Continuous shot mode will allow you to capture single moments of quick action and movement, like running or sports, without having to worry about figuring out aperture or shutter settings.
When you set your camera to this mode, the camera will continue to take photos for as long as you hold the shutter button down.

I use this feature on all of my jumping photos. Simply start pressing the button before the jump and keep it held down until they land.
Look through your shots and keep the few in the middle that captured the best air or facial expressions.
TIP: Check your specific camera model to see how many photos it will take in drive mode, because for some cameras this number is three photos, for others it’s 10 photos and some will even continue taking photos infinitely.
Shoot in Raw for Complete Post-Edit Control
Most people are familiar with JPEG photos, but what you may not know is that when you photograph in JPEG, the camera actually does a certain amount of editing to the photo for you.
By shooting in raw mode, you essentially tell the camera not to make any adjustments.
This preserves a greater amount of data within the file and allows you to take complete control of editing, turning even a “throwaway” into something usable.
Be a Photo Ninja
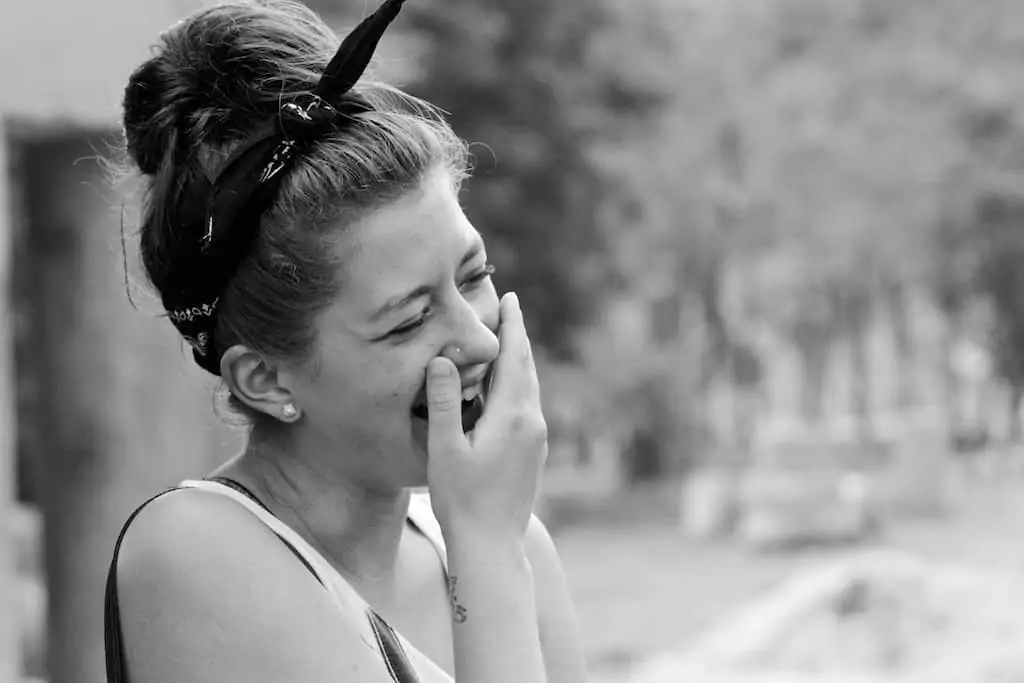
Photographs where everyone is looking at the camera and smiling are nice, but what kind of story do they tell?
Other than maybe what someone is wearing or where the photo was taken, these don’t really lend much to the story.
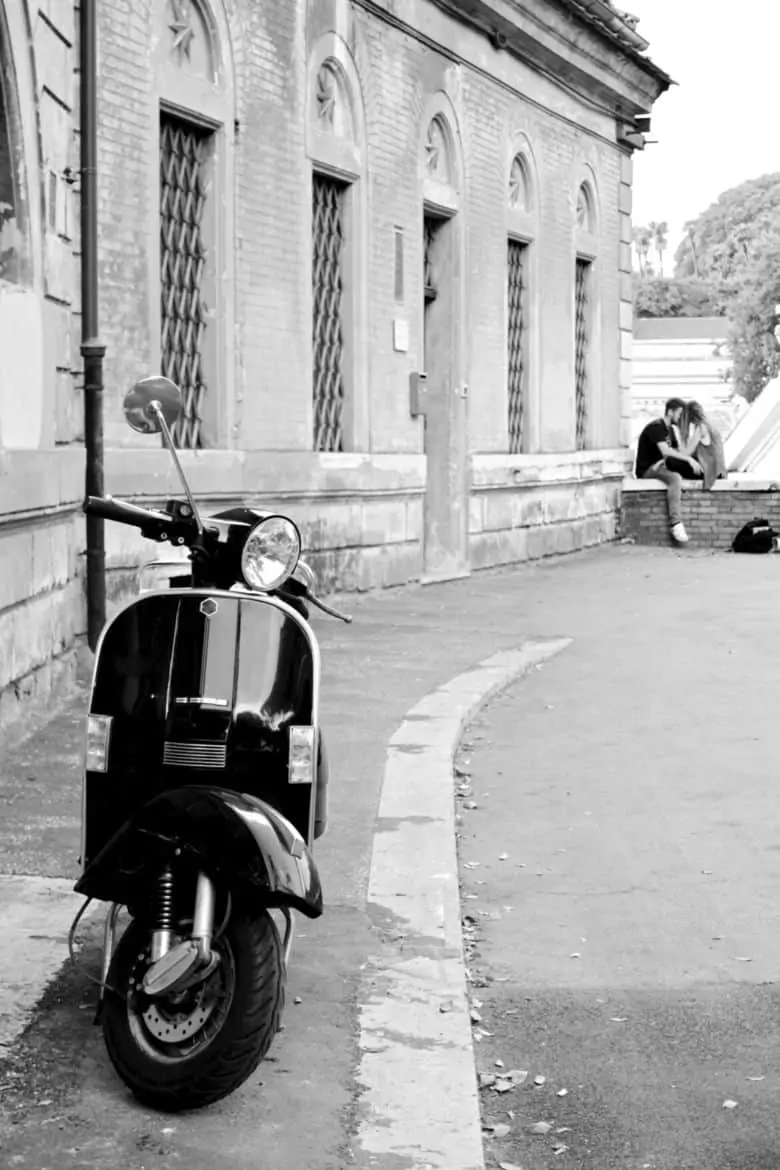
Instead, try photographing moments when your subject is unaware. Think about the moments you will want to remember. Capture interactions between family members.
TIP: Use a zoom lens so you can shoot from farther away and be less likely to be seen.
Take a Wide Photo to Set the Scene
While we often concentrate on shooting what is going on a few feet in front of us, stepping back or using a wide angle lens can really add dimension and a sense of wonder or size to memorable locations.
By removing the person as the intentional primary focus of the picture, you actually end up creating mood and naturally draw the viewer’s eyes to your subject, showing the bigger feeling of the moment.
Go Crazy
You will never know what shot ends up being your favorite, so take about three times more than you think you want or need!
These days we have the luxury of not having to print our shots before viewing, so there is no reason not to go crazy with the shutter.
Sometimes the moment we think we want to capture isn’t quite as good as the one right before or right after, so shoot away now and delete later.
Use Creative Lighting
Backlighting can be used to create silhouettes and focus on surroundings or enhance the mood of an image.

Sunsets and sunrises are popular times to catch amazing color and create visual stories using silhouettes. If indoors, windows are a fantastic source of backlighting.
Tip: Professional photographers absolutely love the hour or so just after sunrise and just before sunset. Known as the Golden Hour, the light is softer and almost magical in quality, and ideal for shooting portraits or people.
Don’t Forget the Details
It’s the little details that we seem to miss the most as our children grow. The tiny little fingers. The ratty old stuffed animal or blankie they just couldn’t live without.
Don’t be afraid to have the subject of the photo be an object instead of a person.
It’s Not Just the Destination, It’s the Journey
Document every part of your journey, even the boring moments during your down time. It’s in those moments that “real life” happens.
Change Your Perspective
Take the first photo that comes to mind and then step out of the box.
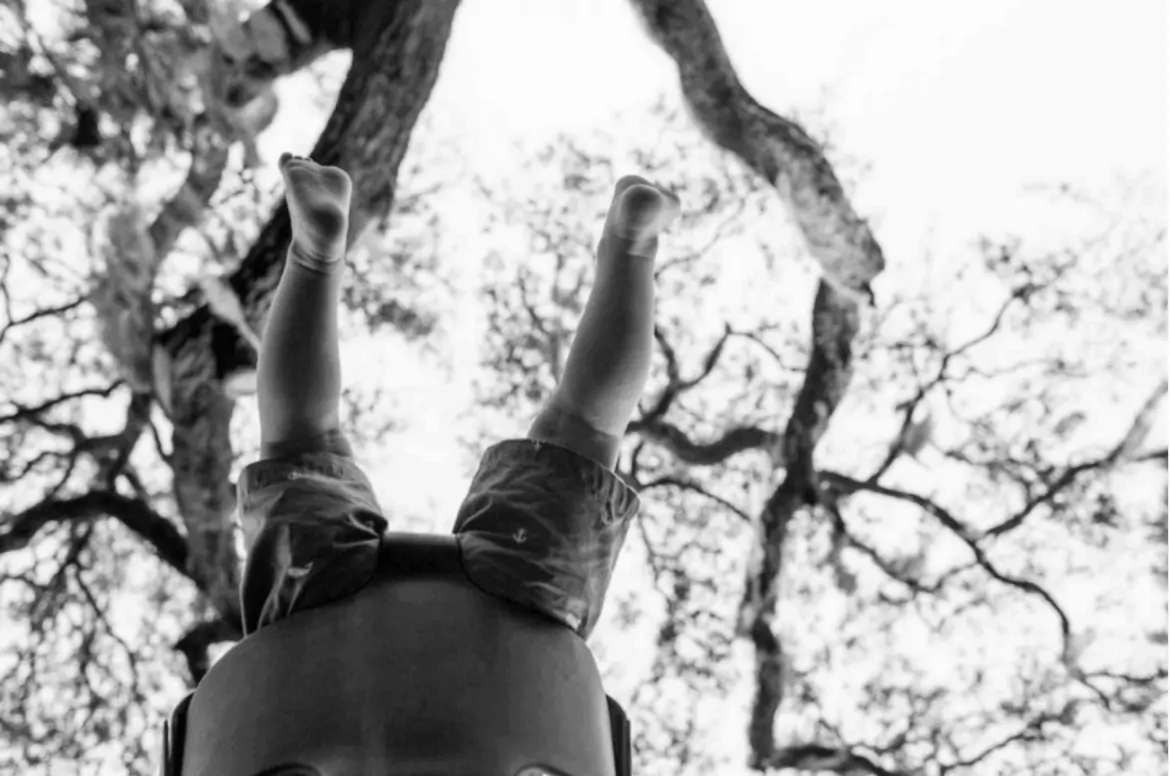
What happens if you stand behind? Beneath? Above? How does it tell a better story?
TIP: Try framing the scene with doors, windows, archways or low-hanging branches to let the viewer feel like they’re peeking in or use natural leading lines (like roads or streams) to lead the viewer’s eyes to your subject.
Remember the Rule of Thirds
Imagine your photo divided like a tic-tac-toe board. On most DSLR cameras, you can even turn on camera grid lines for a visual aid.
By placing a subject along the grid lines or their intersection points or by placing the horizon on the top or bottom line, we create more interesting photographs with a natural esthetic appeal.
Whatever you do, avoid centering your subject!
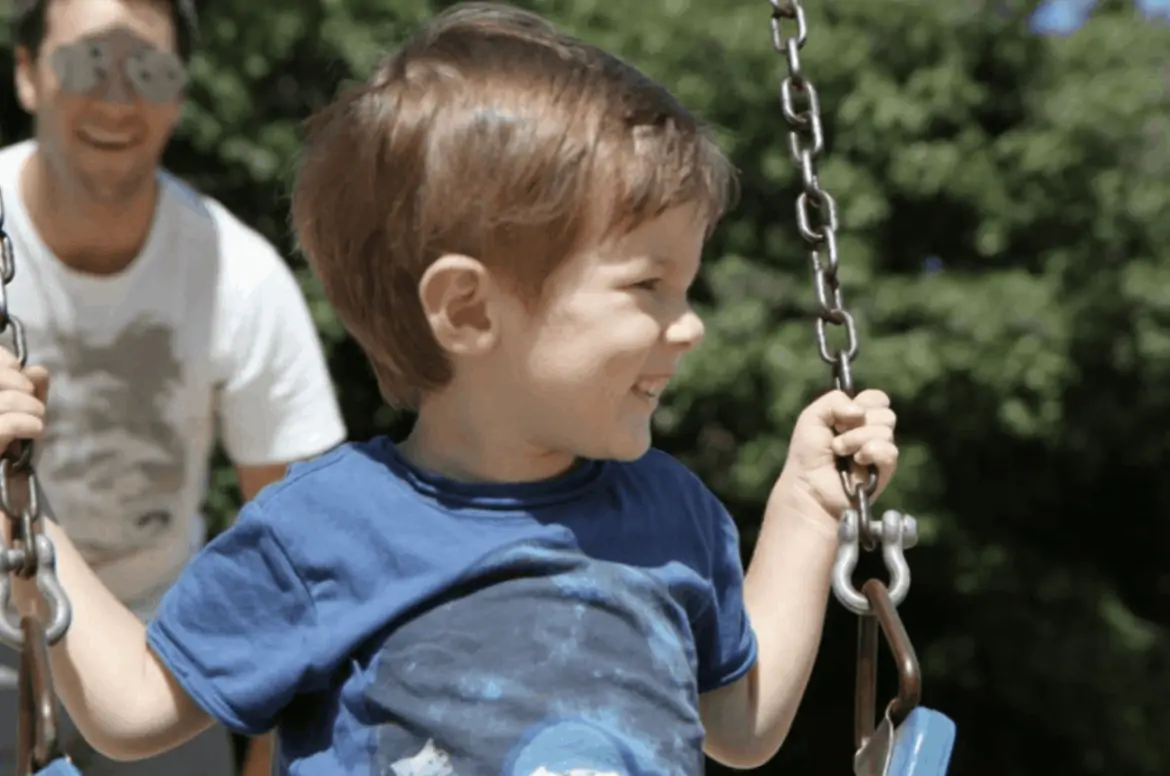
Get Eye Level
When photographing children, get down to their level.
It creates a more interesting photograph and also lets the viewer see their size in relation to their surroundings.

Just Say No to the Flash
Flash is distracting to your subject and it creates a harsh light and unflattering shadows in your photograph.
Avoid it at all costs and remember that you’re shooting in raw, so you’ll be able to do quite a bit of post photo edits that can usually compensate for most low light conditions.
“Shoot from the Hip”
Sneak in more candid shots by avoiding bringing the camera up to your face as this is a surefire way to let people know you’re snapping a picture.
Take a bunch aiming from waist level, above your head or even down low to the ground to see what you get.
TIP: For this, you will want to make sure that your camera is set to auto focus.
The more you practice the photography tips and tricks above, the more naturally they will come to you while you are shooting.
After a while, it will just be second nature to set your subject off center and you won’t need those visual grid lines on your camera screen any more.
Just always keep in mind that the best photos will be captured when you make it a point to compose your shot, not the people in it.
As we’ve learned, photos that follow some simple rules of photography composition are naturally more appealing and can greatly enhance the impact of your visual story.
Remember, a good photograph isn’t about what you shoot, it’s how you shoot it.
Such great tips! When I’m traveling I try to take as many candid and natural pictures as possible. I always try to turn the camera on the beauty around me and not just myself. I find that having my camera on hand at any moment really makes all the difference!
I need to get out more and practice some photography tricks. I love taking pictures of every day happenings in the street, in our neighborhood, and of course, my favorite subject, the sunset.
Ways to improve travel pics are always welcome. I haven’t seen an Alamo in forever. I’m going to look and see if we have any around here.
I love taking candid photos too because it speaks more about the moment than those shots where subjects actually “pose” for the photo. I also love to play around with the black and white or sepia filter.