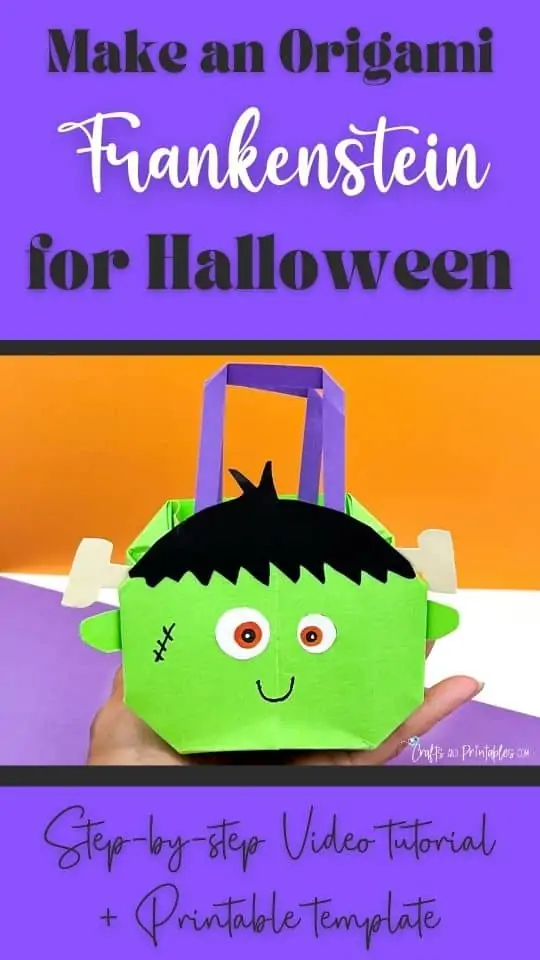
October 31st is just around the corner and we want to share this easy Halloween origami tutorial with you.
All that’s required for this project are some colored paper, scissors and glue! Don’t let those pesky steps fool ya – it’s actually pretty simple even if your kids can do it (and trust me they will).
As a kid, you love to make anything out of paper. And what’s more fun than making origami monsters for Halloween?
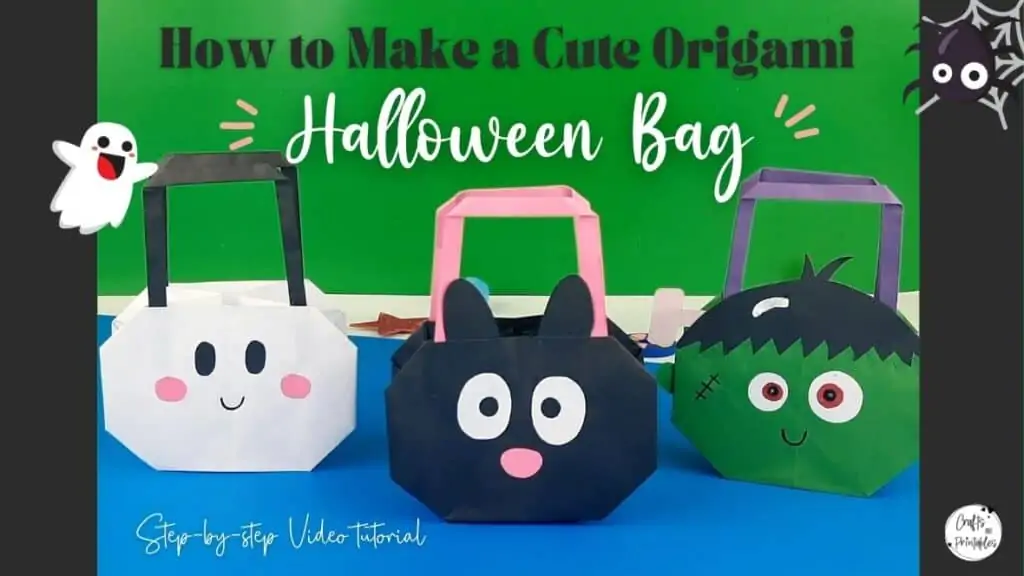
Our Halloween origami treat bags are perfect for using as decor throughout the house. You can set up a cute scene for your stuffed animals to enjoy the holiday too!
Why Should Kids do Arts and Crafts?
Arts and Crafts are the perfect way to encourage creative expression.
They promote creativity, exploration of materials like paint or paper in an open-ended environment that allows children’s imaginations free reign!
Check out all these benefits of arts and crafts for kids below:
- It helps them develop critical thinking skills
- encourages self confidence as they’re able explore their own ideas on how something should look before ultimately completing it themselves (and being proud)
- promotes environmental awareness by upcycling used products instead of buying new ones every day.
Arts and crafts also teaches good work ethic since each project takes time, therefore demonstrating patience too!
When they work together in groups, they might have to negotiate who gets what colors or how many parts will be needed for each person’s part of the project.
This teaches them how to listen to others, compromise, take turns when it is someone else’s turn, share materials equally among everyone in the group without fighting over who gets what piece of paper or whose idea was better than somebody else’s idea.
With all these benefits of arts and crafts for kids there is no wonder that parents often take the time to do arts and crafts with their child.
What kind of paper should I use?
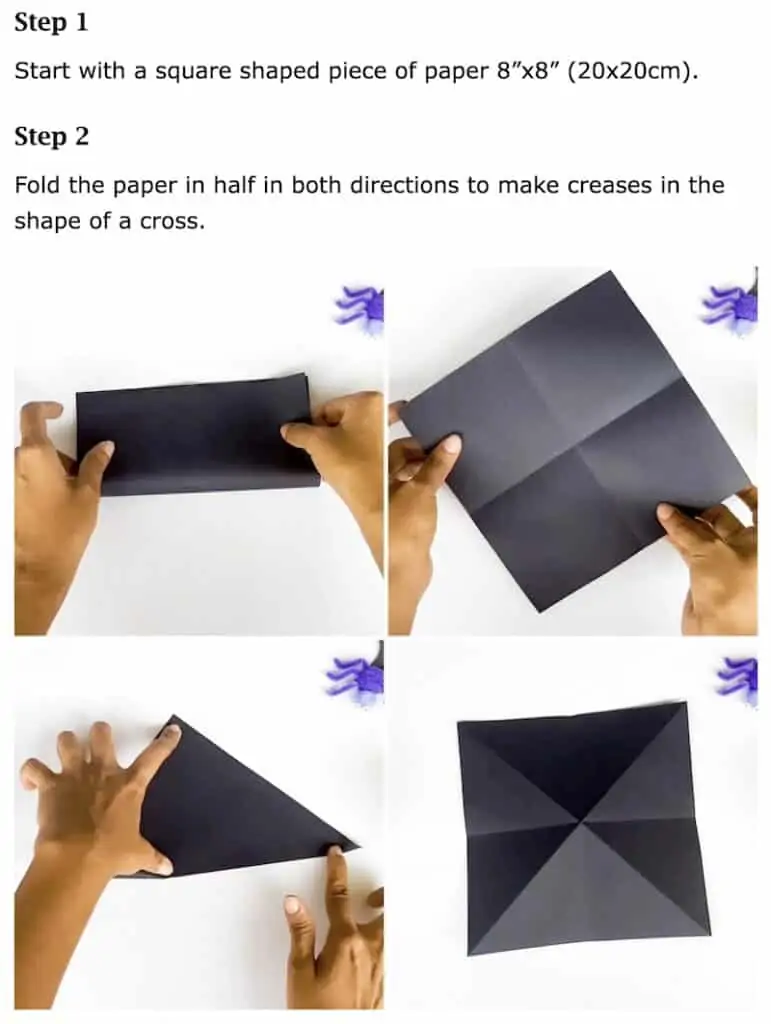
We used 8″x8″ (20x20cm) paper for the main bag.
If you have origami paper, you can use it, but the bag will be fairly delicate and for decoration purpose only.
If you want something a bit sturdier, you can use regular colored construction paper or even card stock paper.
Can I make this bigger or smaller?
Of course you can! Just start off using bigger or smaller squares of paper.
TIP: Use thinner paper (like origami paper) if you want to go smaller and thicker paper (like construction paper) to go bigger.
What other characters can I make?
The basic instructions are the same for all 3 styles, only the color of paper used and the way you choose to decorate the face changes.
This easy Halloween Origami project is easily customizable, just use your imagination.
You could make a whole collection of cute Halloween Origami treat bags to display.
Here are some ideas for you:
- Use orange main paper and green handles to make a pumpkin. Just draw a Jack-O-Lantern face on the front.
- Try purple or green main paper and black handles to make a witch. Cut out and glue on a pointy witch hat and draw her face. Don’t forget the crooked nose and warts!
- Use black main paper and green handles to make a cauldron. Cut out green or yellow bubbles to glue onto the top.
How long will this take me to make?
Despite the number of steps (I always show as many steps as possible so it is easy to follow along), this is a very quick and easy Halloween Origami project.
I can make one in less than 5 minutes.
If it is your first time, or if you have children, I would budget about 30 minutes for this craft.
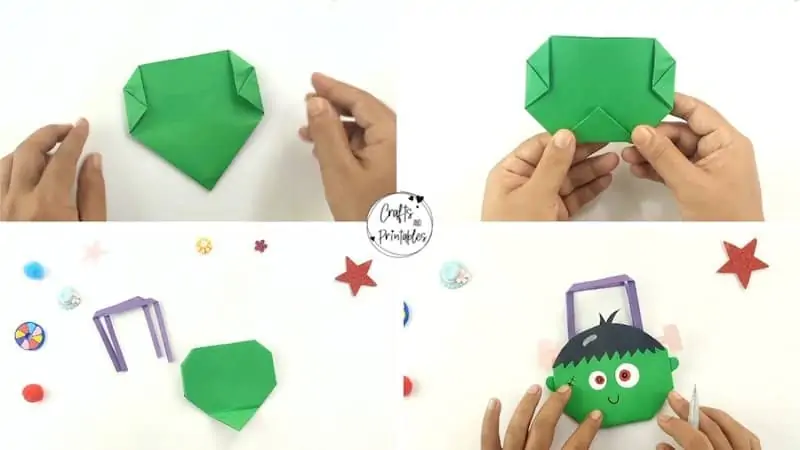
How to Make an Easy Halloween Origami Treat Bag Character
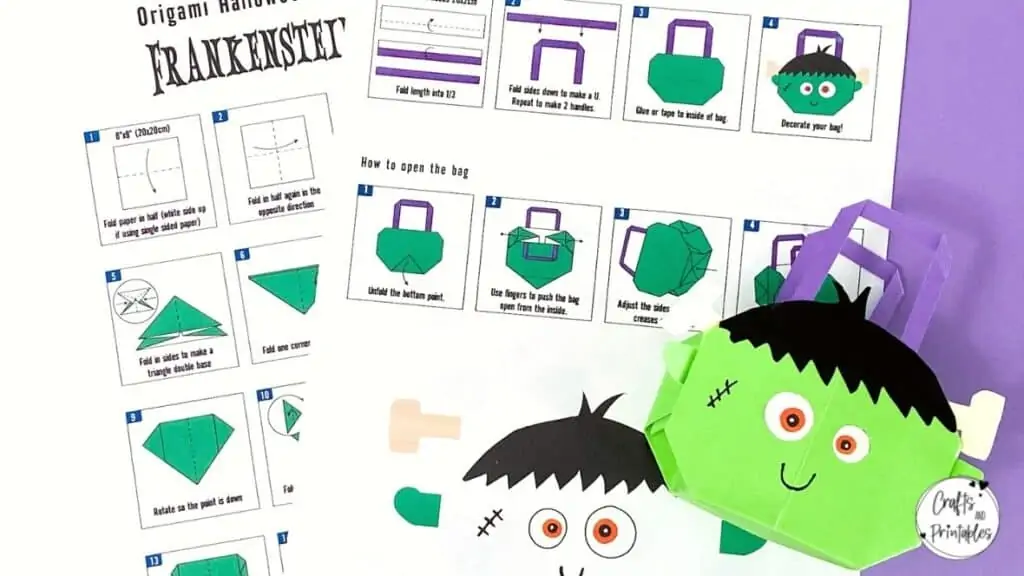
Start off by downloading our free PDF with step-by-step illustrations and a free Frankenstein face and hair template.
Supplies
- Origami Paper or Construction Paper 8”x8” (20x20cm) for bag
- (2) Origami Paper 8” x 3/4” (20x2cm) for handles (or 5.5″ x 1/4″ if using construction paper)
- Paper scraps
- Black Marker
- Tape or glue
Instructions
Visit the Crafts and Printables original post to get step by step written instructions like the ones below. Easy peasy!
We hope you enjoyed our blog post and Happy Halloween!
Do you have video tutorials?
Yes, we do! Origami is one of those things that is easier to follow along via video (in my opinion) so I’ve made two for you.
You can follow along with our written step-by-step instructions (there is a printable version at the very bottom of that post) or you can watch our How to an Easy Halloween Origami Treat Bag videos on YouTube.